Monday, December 28, 2009

True Friend...


To view an image up-close, please click on the photo.

Oh my, am I having the post-Christmas blues today! I usually love to get up and get my Monday morning going with a Mojo Monday sketch-inspired card, but today just got away from me and I finally found some downtime very late in the day to create. The holidays had me thinking about my many lovely friends that live so far away, so I decided to dedicate today's card to friendship.
I love the color combination of green and purple (horrible to wear, but wonderful on a card!) A while back, I had found a pretty piece of stationary cardstock at my local paper store but didn't quite know what to do with it. Julee's sketch gave me the perfect chance to put it to good use as an elegant background element. For the circular element, I substituted this pretty bloom, which I water-colored with Elegant Eggplant. The little monarch butterflies' bodies are done in a little Liquid Pearl, as is the dotted scallop frame. All are popped up just a wee bit for some dimension, and my sentiment couldn't be more true.
BEAN NOTES: Papertrey Ink In Bloom Stamps; Stampin' Up Elegant Eggplant and Always Artichoke Classic Dye Ink; Kate's Paperie Designer Paper; SU Orchid Opulence, Kiwi Kiss, and Very Vanilla Cardstck; SU Elegant Eggplant Textured Cardstock; Spellbinders Classic Rectangle and Classic Scallop Rectangle Nestabilities; Martha Stewart Monarch Butterfly Punch; Purple Brads (generic); Kate's Paperie Purple Satin Ribbon
HAPPY BEANS: Gold Liquid Pearls; Watercolor Blending Tool

Thursday, December 24, 2009

A Brand New Year...


To view an image up-close, please click on the photo.

It's hard to believe that 2009 is almost over. Here we are on Christmas Eve, and in just a few days we'll be ringing in the new year. Over at the Pals Paper Arts, I have the honor of being this week's Featured Artist and I was lucky enough to get to use one of the amazing Margaret Moody's fabulous sketches.
I was actually really excited to break open Stampin' Up's Brand New Year stamp. It's been sitting around for months just waiting to be used! For this card, I turned Margaret's sketch on its side and stamped the image in silver Encore! ink on Basic Black cardstock. There is something very elegant about this image, and I decided to try to stick with that feeling for the rest of the card's design.

For the background elements, I took some leftover Christmas wrapping ribbon and "threaded" it by cutting very narrow slits in my cardstock. For a final touch, I glassed up the champagne glass with some Crystal Effects. Cheers!
BEAN NOTES: (Unless otherwise noted, all materials are Stampin' Up) Brand New Year and True Friend Stamps, Papertrey Ink Simple Alphabet Stamps**; Encore! Silver Ink Pad; Basic Black, Real Red, and Whisper White Cardstock; Various Ribbon (generic)
HAPPY BEANS: Crystal Effects
**Please note that you may easily substitute either SU's Simple Serif Mini Alphabet & Numbers or Calendar Alphabet & Numbers for the PTI set.**

Monday, December 21, 2009

Winter's Thanks...


To view an image up-close, please click on the photo.

Only a few more days until Christmas and I'm desperately trying to squeeze in some time to make thank you cards for all the goodies we've been gathering beneath the tree! Luckily, this week's Mojo Monday sketch is nice and simple, and I thought I combine the challenge with Julee's Winter Mittens contest. (How's that for efficiency at the holidays??)
For this card, I took out my beloved Perfect Plum paper that is down to its last sheet and stamped a few pretty snowbursts all over for my background. For the mittens, I printed out the digi onto white cardstock and colored in a pattern using Copics, adding a tiny liquid pearl before carefully cutting out the image. My sentiment is actually Julee's combined with one from another stamp set (Bean Tip: If you are in need of a specific type of sentiment, masking and combining sets is a wonderful way to go. You'd be surprised at how many different sayings you can come up with to suit your needs!)
BEAN NOTES: Verve Winter Mittens Digistamp, Stampin' Up Snow Burst, and Papertrey Ink Big & Bold Wishes and Simple Alphabet Stamps; Stampin' Up Perfect Plum Classic Dye Ink; Whisper White Craft Ink; Copic Sketch Markers; SU Perfect Plum, Elegant Eggplant, Almost Amethyst, and Whisper White Cardstock; Paper Shapers 1-1/4" Circle and 1-1/2 Scallop Circle Punches; White Organza Ribbon (generic) Foam Dimensional Squares (generic); Computer and Printer HAPPY BEANS: Silver Liquid Pearls; Hobby Blade

Thursday, December 17, 2009

A Merry Christmas Thank You...


To view and image up-close, please click on the photo.

Christmas is literally just around the corner and the gifts are piling up in our tiny apartment! This means I have a ton of thank yous to send out and this week's Color Throwdown is another great reason to get another done to show just how much we appreciate the wonderful presents nestled under the tree. I also thought this would make a great second card for this week's Pals Paper Arts Winter Wonderland challenge as well!
For this card, I chose to marry traditional with the Throwdown's not-so-traditional color combination. The Cool Caribbean (in my case, Soft Sky, as CC was a bit before I started stamping) was the little modern flair here. The large oval background was created with a stencil and some Always Artichoke ink and a sponge dauber. It's difficult to see in the photo, but I sprayed some Glimmer Mist over the sponged image, too. This lovely bird image was stamped twice, with the popped-up image water-colored in Real Red and I added some Stickle berries and some Liquid Pearls along the scalloped frame. I combined two sentiments from Teeny Tiny Wishes and "hung" it to wrap up my Christmas thanks.
BEAN NOTES: Stampin' Up Teeny Tiny Wishes and Inkadinkado Birds Galore Stamps; SU Real Red, Always Artichoke, and Kiwi Kiss Classic Dye Ink; SU Soft Sky, Real Red, Kiwi Kiss, and Very Vanilla Cardstock; Spellbinders Flourish Impressabilties Stencil, Spellbinders Long Oval and Petite Oval Nestabilities; Quickutz Stripes Embossing Folder; Big Shot; Foam Dimensional Squares (generic); Basic Gray Ribbon HAPPY BEANS: Gold Liquid Pearls; Ranger Christmas Red Stickles; Red Embroidery Thread (generic)

A Very Merry Christmas...


To view the image up-close, please click on the photo.

This week's Pals Paper Arts Challenge theme is Winter Wonderland. To me, winter pretty much means hot cocoa wit a tower of whipped cream, cookies for Santa, and Christmas! In all the hustle and bustle of preparing for the holidays, I completely forgot to make a special Christmas card for my wonderful husband. He's a selfless, generous, and amazing husband and father, and his favorite part of his day is getting to spend time with our son.
For this year's card, I decided to make a photo card starring our little rugrat. He just got his very own little Christmas tree and loves to look at the lights and take the ornaments off just to put them back on. I took this photo of him peeking out from behind the tree, and I thought it would put a smile on Daddy's face. Sometimes when I make cards I forget that some of the best material I have is what means the most to me.
Here I created an easy photo frame by first stamping on a solid piece of Real Red cardstock with Whisper White Craft Ink. After heat setting, I carefully cut around the tree image and around the cardstock to leave an opening for my photo. Out came the rub-ons, which are great for adding sentiments to photos. The "ribbon" treatment is actually three 1/18" strips of cardstock threaded through in two different directions. A few Stickles and a gold-star topper later, my special card was all done, and I hope hubby likes it!
BEAN NOTES: (Unless otherwise noted, all materials are Stampin' Up) Patterned Pines Stamps; Chit Chat Rub-Ons; Whisper White Craft Ink; Encore! Gold Stamp Pad; Real Red, Glorious Green, and Whisper White Cardstock; Ranger Christmas Red and Lemon Lime Stickles; Gold Liquid Pearls
HAPPY BEANS: Photograph; Hobby Blade; Fiskars Leave It To Weaver Border Punch

Tuesday, December 15, 2009

Sincere, Heartfelt Thanks...


To view an image up-close, please click on the photo.

This was the second of my submissions for the Guest Star Stamper Challenge for December. The category was "Best Use of Leaves Project" and I decided to create another Thank You card to give to someone after the holidays. Our very loving and generous family members have sent us mountains of packages already, so I thought this was a grand opportunity to get some thank you's going.
For this card, I stamped my large leaf image in Basic Black Craft Ink and heat set it. Because I wanted the card to still have a festive flavor, I over-stamped the image a second time with Ruby Red Craft Ink. Next, I created a mask and stamped over that with my text image and some Encore! Gold ink. After I removed the mask, I outlined each leaf in gold pearl, which I thought would give the card an elegant look. The ribbon treatment was created with a few slits in my cardstock and some satin ribbon, and I think the "sincere" sentiment says it all!
BEAN NOTES: Papertrey Ink Turning a New Leaf, Text Style, and Big & Bold Wishes Stamps; Stampin' Up Basic Black and Ruby Red Craft Ink; Encore! Gold Ink Stamp Pad; PTI Ripe Avocado and Spring Moss Cardstock; SU Very Vanilla Cardstock; Kate's Paperie Red Satin Ribbon; Foam Dimensional Squares (generic) HAPPY BEANS: Gold Liquid Pearls; Hobby Blade

Monday, December 14, 2009

Countdown on the Avenue...


To view an image up-close, please click on the photo.

I decided to be ambitious this month for Nichole Heady's Guest Star Stamper Challenge and make something that I hope can become something of an heirloom keepsake. I have always loved advent calendars and have wanted to create my own for quite some time. After many starts and stops (and a few little tears!) I finally finished and I was pleased with how it turned out.
We recently moved to Manhattan, and, though the skyscrapers are breathtaking, it's the older, lovely brownstones that speak to me. For my project, I was inspired by these beautiful buildings. First I chose my colors, which was a combination of black, red, green, and light blue. For my masonry, I printed a brick background using my computer and an inkjet printer.


Next, I stamped and embossed all the windows on heavy vellum, cutting each one out and then gluing on paper-pieced shutters and then adhering each to a piece of vanilla cardstock (some with pretty curtains!) for a lighted glow. As a wintry touch, I sprinkled a bit of Fun Flock on the rooftops and the sill of each window.


To add some holiday festive flavor, I made pine branch swags to decorate my embossed vellum lamps, with a few Stickle-berries thrown in.


For my doors, I stamped onto colored cardstock and carefully painted each doorknob with Shimmer Paint (the knobs are so tiny I had to use a needle!) For my sweet wreath, I again used a pine branch punch and trimmed them down, layering around a circle and adding more berries. A shimmery outlined ribbon punch spruced up my blue door, and I made a tiny door hang with the letters J-O-Y stamped on tiny pieces of cardstock with an itty-bitty nail for good measure.

Assembling the houses took quite some time, as I had to make up my own template. Each window/door opens into a little box inside the houses, and each frame had to be hand cut into the walls with a hobby blade. The countdown numbers were printed on the computer in an elegant script and hole-punched into circles.

(The teeny window on top of the green house is just large enough for a plump jelly bean!)

I used a cornice punch for my rooftop, layering in the same textured cardstock as used in the large masonry behind each door on the first floor.

I then added a "wrought-iron" fence to each house and then attached all three houses to a base. The finished advent calendar is approximately 9-1/2" tall x 13-1/4" wide.


Now, since December is already well underway, we'll enjoy this calendar without any treats inside it this year (the above chocolates were for display, and I'm pretty sure my husband has already eaten them!) - but we'll be filling it with yummy goodies in the next!
BEAN NOTES: Papertrey Ink Home Made and Simple Alphabet Stamps; Stampin' Up Basic Black Craft Ink; SU Riding Hood Red, Wild Wasabi, and Baja Breeze Classic Dye Ink; PTI Stamper's Select Vellum Cardstock; DVWV Dark Gray Textured Cardstock; SU Riding Hood Red, Basic Black, Baja Breeze, Wild Wasabi, and Very Vanilla Cardstock; Martha Stewart Pine Branch, Cornice, Picket Fence, and Ribbon Bow Punches; 1/16" and 1/4" Hole Punches (generic); Hobby Blade; Computer and Inkjet Printer; Black Embossing Powder (generic); Foam Dimensional Squares (generic); Sakura Clear Star Gelly Roll Pen
HAPPY BEANS: Scor-Pal; SU Silver Shimmer Paint; Needle, Ranger Christmas Red Stickles, Fun Flock, SU 2-Way Glue

Friday, December 11, 2009

Joy & Peace...


To view an image up-close, please click on the photo.

Christmas is really in the air and this week's Moxie Fab World Challenge honors all the Creatures Great & Small that venture out onto our creative projects during the holiday season. For my project, I decided to make an ornament featuring a tiny dove, a symbol of peace and joy.
I don't usually put step-by-step instructions, but I thought some of my readers might find it interesting to see just how simple this ornament was to create.
1. First I stamped the wonderful star image three times and cut out the holes with a die cut and my Big Shot. I also hole-punched the ribbon hole as well.
2. Next, I scored all three stars straight down the middle of each for easier folding. I then set those aside and created my dove.
3. The little avian was modeled after Stampin' Up's Birds & Blooms Sizzix die, which was a bit too big for my star. I drew my own template for the body and wings, then used a tiny hole punch for the eye.
4. Using some white embroidery thread, I attached the dove and then fastened the thread to the star.
5. The "Joy" tag was simply stamped with the sentiment with craft ink and weighted down (a dime turned out to be the perfect size and weight!)
6. For the bow at the top, I fashioned one from ribbon and glued on two little red buttons to bring it all together.
BEAN NOTES: Waltzing Mouse Seasons of Love Stamps; Stampin' Up Riding Hood Red Classic Dye Ink; SU Whisper White Craft Ink; SU Whisper White and Riding Hood Red Cardstock; Spellbinders Classic Circle Nestabilities; 1/4" and 1/16" Hole Punches (generic); Paper Shapers 1-1/4" Circle Punch; White Taffeta Ribbon (generic); Embroidery Thread (generic); Red Buttons (generic); Hero Arts Gemstones; Scor-Pal
HAPPY BEANS: a Dime

Wednesday, December 9, 2009

A December Birthday...


To view an image up-close, please click on the photo.

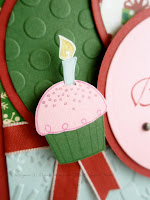
My wonderful Dad-in-Law has a birthday a couple days before Christmas. As a boy, he always received the "Happy Birthday/Merry Christmas" presents, which isn't nearly as fun as birthdays far away from the most celebrated birthday of all! Fear not, he'll be getting his own special dinner and birthday gifts, including this card I made for him. I decided to combine two challenges this week: Mojo Monday and Color Throwdown. Interestingly, the colors for this week's Throwdown were very Christmas-y. So, despite our efforts to keep the two special days separate, this card combines both the Christmas festive spirit with some hearty birthday wishes!
I made use of some fun designer paper for the background using this creative Mojo sketch. For some added texture, I ran some cardstock through my Big Shot with embossing folders. I also paper pieced this cute little cupcake, adding some "sprinkles" along the way. A simple sentiment, a pretty ribbon, and lots of good wishes later, I had a finished card for a very special Dad.
BEAN NOTES: Stampin' Up Sincere Salutations Stamp; Jolly by Golly and DCWV Ultimate Christmas Stack Designer Paper; SU Riding Hood Red, Soft Sky, Pixie Pink, Soft Sky, and Sahara Sand Classic Dye Ink; SU Wild Wasabi, Riding Hood Red, Soft Sky, Whisper White, and Pretty in Pink Cardstock; Cuttlebug Snowflakes and Quickutz Small Dots Embossing Folders; Big Shot; Foam Dimensional Squares (generic); Mini Brads (generic) HAPPY BEANS: Sakura Yellow Star and Pink Star Gelly Roll Pens

Thursday, December 3, 2009

Christmas Thanks...


To view the image up-close, please click on the photo.

It's a Pals Paper Arts Inspiration Challenge and despite my terrible time crunch today, I decided to whip up a thank you card for the wonderful gifts and good-wishes we will be getting this year. The awesome design team at PPA unearthed this lovely image as this week's inspiration and I chose to use the colors in my card.
Okay, so I'm completely addicted to Rub-ons, especially the Chit Chat set from Stampin' Up. For this card, I actually selected words from two different sentiments, one in Chocolate Chip and the other in Whisper White. It's a great way to say what you want without a lot of hassle! I created my snowy park scene with a self-made stencil, a sponge dauber, and some craft ink. I wanted a very soft look, so I used only craft ink, and I was pleased with the effect.
BEAN NOTES: (Unless otherwise noted, all materials are Stampin' Up) Pendant Park Stamps; Chit Chat Rub-Ons; Whisper White, Chocolate Chip, and Very Vanilla Craft Ink; Soft Suede, Very Vanilla, and Riding Hood Red Cardstock; Kate's Paperie Olive Organza Ribbon
HAPPY BEANS: Sponge Dauber

Tuesday, December 1, 2009

It's Beginning to Look a Lot Like...A Winter Hop!

Welcome to the third 2009 Holiday Hop! A group of talented Stampin' Up! Demonstrators are ready to show off their paper crafting skills with inspirational ideas using Stampin' Up! products for the upcoming Christmas/Winter holiday season.

For today's Hop project, I wanted to make something other than a card, but I didn't have a whole lot of time. There are a lot of heavy readers in our family, so I thought a nice little treat might be a handmade bookmark. These were quick and easy, and could certainly be embellished in any number of ways.

To view an image up-close, please click on the photo.

First, I found some tags (picked up at any local craft store) and used a border punch along the bottom. Then, I stamped this wonderful snowflake image from Stampin' Up's Patterned Pines set in the color of my choice (for these three I chose Sage Shadow, Ruby Red, and Dusty Durango) in a random pattern to create a pretty background. I then used a sponge dauber along the edges and added a strip of matching cardstock. With a Stampin' Write marker, I colored each hole-punch reinforcement to match as well. Next, I stamped three of the terrific images from Christmas Punch to on colored cardstock in Whisper White to create my dangling bookmark charms. A cute snowflake from the same set and a little ribbon later and I'm all done!

BEAN NOTES: (Unless otherwise noted, all materials are Stampin' Up) Christmas Punch and Patterned Pines Stamps; Whisper White Craft Ink; Ruby Red, Sage Shadow, and Dusty Durango Classic Dye Ink; Ruby Red, Sage Shadow, and Dusty Durango Cardstock; Stampin' Write Markers (Ruby Red, Sage Shadow, and Dusty Durango); Grosgrain Ribbon; Wide Oval,Curly Label, and Scallop Oval Punches; Fiskars Scallop Punch HAPPY BEANS: Tags (generic)

**To order these or any other current Stampin' Up products, please email me HERE.

HOLIDAY HOP LINE-UP

Click on any of the sites listed below to start hopping! We're thrilled to have you visit and excited to hear what you think of our hop. Feel free to leave as many comments as you'd like along the way...


1. Kris Kilcoyne (Kween Bee Kreations)

2. Carla Bazhenow (Carla's Scraps)

3. Linda Callahan (Stampin' Seasons)

4. Melanie Collins (Oops a Daisy)

5. Mary Fish (Stampin' Pretty)

6. Tricia Gillam (Soul Stamper)

7. Jill Gregory (Stamping Heart)

8. Kim Lampone (Stamp, Scrap, Get Kreative)

9. Kalshelia Lloyd (Stampin' Fabulousity)

10. Regina Mangum (The Stampin' Bean)

11. Margaret Moody (Margaret Moody)

12. Debbie Pierce (Stampin' Sunshine)

13. Ann Schach (The Stampin' Schach)

14. Gina Shaw (Cards by Gina)

15. Lourdes Torres (Cozy Crafty Corner)

If you've hopped over from the fabulous Kalshelia's Stampin' Fabulosity, I'm stop #10. Now head on over to the inimitable Margaret Moody and check out her wonderful Hop project. Thanks for stopping by!