Thursday, September 30, 2010

Thanks a Button...

to view the image up-close, please click on the photo


I have to admit that I'm a little stressed out this week. There just seems to be so much to do and so little time in which to do it. So, I thought I'd relax by making a simple card. I was inspired by the fab colors over at Our Creative Corner (even by their challenge image!) and by the CAS button challenge debuting today at the Pals Paper Arts Challenge. I thought I'd try my hand at making a card that was both chic and modern. If only life were this simple!

SPILLING THE BEANS
  1. Make card from card stock.
  2. Trim card stock and adhere.
  3. Apply rub-on.
  4. Punch circles and adhere with glue.
  5. Adhere buttons with strong adhesive.
BEAN NOTES
  • Rub-Ons: Chit Chat (Stampin' Up!)
  • Card Stock: Crumb Cake, Marina Mist, Soft Suede, Early Espresso, Very Vanilla (SU!)
  • Tools: Corner Chomper (We R Memory Keepers); Circle Punch (EK Success)
HAPPY BEANS
  • Accents: Buttons (Basic Grey)
By the way, I hope you join me tomorrow for my official debut on the Clear & Simple Stamps Design Team when we reveal October's Stamp of the Month...it's sure to be spookily delicious! Plus, one of my cards is the featured project on the exclusive Clear & Simple Stamps iPhone/iPad App! Check out the sneaky peeky below...

Wednesday, September 29, 2010

Rockin' Out...

to view the image up-close, please click on the photo

I don't post very many scrapbook pages, but I wanted to put this one up in honor of my little rugrat's first complete week of pre-school. I'm still a little shell-shocked at how quickly he is growing up, and, when I saw this challenge from The Studio Challenge, to scrapbook a perfect day that hasn't happened yet, I couldn't resist. 
For my page, I was inspired by these photos of my little man playing his "guitar." I love how he rocks out, and I wanted the pics to be the star of the show. To me, the perfect day is any in which my little boy is as happy and delighted with life as he was the day I took these pictures. I know life is going to get harder and harder as he grows up, and I hope that he can hold on to as much of his joy as he can.
I knew right away that one of my favorite Taylored Expressions sets, You're My Hero, would be just perfect for a page featuring my 'lil rock star.

SPILLING THE BEANS
  1. Stamp background onto patterned paper. Stamp sentiment.
  2. Adhere gemstones.
  3. Stamp guitars and color. Fussy cut and paper piece each guitar. Adhere with foam tape.
  4. Print and trim photos. Mat with card stock and metallic paper. Adhere with foam tape.
BEAN NOTES
  • Stamps: You're My Hero (Taylored Expressions)
  • Card Stock: Classic Red (Prism); Choice Snow White (TE)
  • Patterned Paper: (unidentified)
  • Specialty Paper: Pink Metallic (DCWV)
  • Specialty Ink: Encore! Bronze Metallic (Tsukineko)
  • Dye Ink: Memento London Fog (Tsukineko)
  • Color Medium: Metallic Pens (Sakura)
  • Accenta: Clear Gemstones (Hero Arts)
HAPPY BEANS
  • Other: Photographs


Monday, September 27, 2010

There's No Place Like Home...

to view the image up-close, please click on the photo

My little boy loves the book, The Wizard of Oz. I have to admit that, when I was a girl, I was afraid of the movie -- I mean, who wouldn't be frightened of flying monkeys? This week's 2 Sketches 4 You Sketch Challenge had us playing with some very fun repositionable stickers, and when I saw how adorable they were, any fears I had went right out the window!

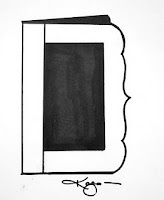
This week's sketch is from the ever fabulous Kazan, and I flipped it to create an "emerald" stage. I love the decorative edge of the sketch and I made that the top of card. Now I'm off to, what else? See the Wizard, perhaps?

SPILLING THE BEANS
  1. Make card from card stock.
  2. Sponge background on card stock. Adhere to card.
  3. Trim glittered card stock. Run pieces through crimper. Adhere with glue.
  4. Border punch glittered card stock. Adhere with foam tape.
  5. Trim glittered card stock. Adhere to bottom edge of card with foam tape.
  6. Apply stickers to white card stock. Trim around edges. Adhere to card with glue.
  7. Adhere sentiment stickers to white card stock. Trim in banner shape and adhere with foam tape.
BEAN NOTES
  • Stickers: The Wizard of Oz (EAD Designs)
  • Card Stock: Pear Pizazz, Whisper White (Stampin' Up!)
  • Specialty Paper: Green Glittered Card Stock (The Paper Co.)
  • Ink: Pear Pizazz Classic Dye (SU!)
  • Tools: Cornice Border Punch (Martha Stewart Crafts); Embossed Scallop Border (EK Success)

HAPPY BEANS
  • Tools: Paper Crimper (Fiskars)

Thursday, September 23, 2010

Thank You, Thank You, Thank You...

to view an image up-close, please click on the photo

This has been a doozy of a week. My son started pre-school (without me!), I had to attend a black-tie event (in a hot pink dress), and I finally got to share my big, fun news. The inimitable Nicki Jackson of Clear & Simple Stamps invited me to join her incredible talented and creative Design Team and I'm still giggling with glee. CSS is on the cutting edge of the paper-crafting world and they are known for their chic and fashion-conscious images, as well as their one-of-a-kind iPhone/iPad App. I am thrilled and delighted to be a part of such a wonderful group of amazing designers and I hope you will visit their blogs (see my sidebar) for tons of inspiration.


Nicki was one of the very first to recognize my love of card-making and I wanted to make a card to show how much I appreciate her confidence in my abilities. To thank Nicki and the entire Clear & Simple Stamps family, I thought it only appropriate to use one of their fabulous stamps from a limited edition set called, simply: Thank You. For this card, I was inspired by a trio of challenges: the amazing colors from the Play Date Cafe Challenge, this week's mojolicious Mojo Monday Sketch, and the irresistible Off-Set Scallop Challenge over at Moxie Fab World! So, "thank you, thank you, thank you" from the bottom of my little paper-crafting heart. I hope you will join me in the coming months on my CSS adventure!

SPILLING THE BEANS
  1. Make card from card stock.
  2. Trim patterned paper and adhere.
  3. Trim card stock. Stamp sentiment and apply liquid dimensionals. Mat and adhere to card.
  4. Punch scallop border strips; adhere.
  5. Punch scallop circles. Assemble in off-set rounds with foam tape. Attach button and adhere.
  6. Punch circles from card stock and adhere.
  7. Tie ribbon and adhere.
BEAN NOTES
  • Stamps: Thank You-limited edition (Clear & Simple Stamps)
  • Ink: Fresh Snow Hybrid (Papertrey Ink)
  • Card Stock: Purplicious, You're Such a Gray-cious Host (CSS); Pear Pizazz (Stampin' Up!)
  • Patterned Paper: Fresh Print Clothesline (Little Yellow Bicycle)
  • Fibers: Purple Satin Ribbon (Kate's Paperie)
  • Tools: Scallop Border Punch; Punch Pack (SU!)
  • Accents: Lettuce Liquid Dimensionals (Adirondack); Button (PTI)
HAPPY BEANS
  • Tools: Scallop Circle Punches (EK Success)

Forever and Always...

to view an image up-close, please click on the photo

Earlier this week, I made a card for a pair of newlyweds. Today, I thought I'd celebrate an anniversary, and one in particular. My son's great-grandparents will have been married for more than 60 years this month, which is a wonderful love story in it of itself. I can only hope that my own marriage will last as long and with as much love and respect as theirs. 
To get me started, I used this week's terrific sketch from the Pals Paper Arts Challenge. I also thought this would be the perfect chance to play with my new Taylored Expressions Key Ingredients. The papers are so pretty and I thought I'd let them do the work for me today in wishing Rachel and John a very happy anniversary, forever and always!

SPILLING THE BEANS
  1. Make card from card stock.
  2. Trim patterned paper; round edges.
  3. Trim horizontal element and mat. Add rub-on sentiment and adhere.
  4. Die-cut and assemble ribbon from felt. Attach with glue.
  5. Stamp and fussy cut butterfly. Adhere.
  6. Apply liquid dimensionals.
BEAN NOTES
HAPPY BEANS
  • Fibers: Yellow Felt (generic)
  • Dies: Bigs 3-D Flowers (Sizzix)


Wednesday, September 22, 2010

Hop on Pop {CSS/CCM Blog Hop!}...

to view an image up-close, please click on the photo

Hey there! If you've just tuned in, today is day two of the Perfect pair Blog Hop featuring Clear & Simple Stamps and Creative Cuts & More. I'm extra, extra, extra excited because I also get to let slip a big secret I've been keeping!
Beginning today, I will have the extreme honor of joining the Clear & Simple Stamps Design Team! Lucky, lucky me, and I am so thrilled to be joining such an amazing team of talented paper-crafters. You'll be hearing much more about this in the weeks to come!
We've got some fabulous projects to inspire you, each showcasing how wonderfully well stamps and die-cuts go together. Plus, one lucky commenter will win a $25 gift certificate to Clear and Simple Stamps and another will win a gift certificate to Creative Cuts & More! To be eligible, please leave a comment on each blog, as winners will be drawn from all comments made by Friday, September 24.

If you've hopped over from the lovely and talented Lila's blog, be sure to visit the full line-up, which begins at the Die Cut Diva blog!

For my hop project, I used the super-cute Popcorn Extras set from Clear & Simple Stamps and paired it with, what else? The adorable popcorn box and pop-up card from CC&M!


I began with the popcorn box (which arrives plain and in the color and texture of your choosing) and stamped all four sides multiple times with the fun popcorn image, then colored all of it in with a white souffle marker. Next, I border punched some trim for the top and cut out just one fluffy piece of popcorn to "pop" out beneath my sentiment element. After a quick assembly, I had a cute treats box just waiting to be filled with some yummy goodness!


Next, I created a card to coordinate with my box, using a very fun "pop-up" card die-cut. I decorated the front by stamping popcorn to match my box background, again using the same border punch. That cute little filmstrip is another CC&M die-cut, to which I added a piece of the fluffy good stuff. After stamping the sentiment, I turned to the inside of the card.


The idea of popcorn actually popping was one I thought I'd try to simulate. After covering the inside of the card with patterned paper, I drew a little popcorn box and filled it with stamped popcorn. Then, after cutting out several individual kernels, I attached them with strips of clear acetate. Fun, yes? I love the birthday sentiment and thought it would make my box and card ensemble the perfect celebratory gift with its own little "surprise!"

BEAN NOTES
  • Stamps: Popcorn Extras (Clear & Simple Stamps)
  • Ink: Memento Tuxedo Black Dye (Tsukineko)
  • Card Stock: Peach Parfait, Soft Sky (Stampin' Up!); Solar White (Neenah); Clear Acetate (Papertrey Ink)
  • Patterned Paper: Peach Parfait In-Color Patterned Paper (SU!)
  • Coloring Medium: Souffle White Opaque Puffy Ink Marker (Sakura)
  • Fibers: Soft Sky Grosgrain Ribbon (SU!)
  • Tools: Crown Border Punch (Martha Stewart Crafts)
HAPPY BEANS
  • Die-Cuts: Popcorn Box in Bazzill Smoothies Marmalade Blast (Creative Cuts & More); Film Strip in Raven Black Bazzill Canvas (CC&M); Pop-Up Card in Bazzill Smoothies Ocean Breeze and Marmalade Blast (CC&M)
Thanks so much for hopping by today. Now, head on over to the amazing Kim's blog for more die-cut and inky inspiration!

Creative Cuts & More Blog (intro and sneaks)
Lori Tecler
Steph Zerbe
Jennifer Tapler
Melisa Waldorf
Dana Grothaus
Lynn Stevens
Eva Dobilas
Becky Voth
Jenyfur Pohl
Lila Holgate
Regina Mangum - You're Here!
Kim Langhurst
Chrissy Dickinson
Clear and Simple Stamps Blog, Nicki Jackson


Tuesday, September 21, 2010

Thanks for Being Mine...

to view an image up-close, please click on the photo
**If you are looking for my TE Blast from the Past Blog Hop post, please click HERE! Be sure to check out the cool TE SALE going on right now at the end of the post.**
I am afraid that I am guilty of buying tools and supplies and then never using them, and I am desperately trying to break myself of that habit. My husband got me a wonderful Cricut for my birthday, and I so rarely use it that I made myself a promise that the next project I made would incorporate this cool tool. Lucky for me, this week's JustRite Friday Challenge: Color! had me thinking of a little way to thank hubby for being so nice to me.
For my project, I decided to make a heart basket to fill with some sweet treats and used the lovely challenge colors as a starting point. The twist this week was to make and use a handmade embellishment, and I decided to go all out with some felt rosebuds (you know I love those!) and I found the perfect sentiment to express what I was feeling. Here are the details!

SPILLING THE BEANS
  1. Die-cut heart basket with Cricut from card stock.
  2. Die-cut rosebuds from felt and assemble (not: one die will yield 3-4 rosebuds). Adhere with sticky tape.
  3. Thread ribbon into basket. Tie bow.
  4. Stamp sentiment. Die-cut and apply liquid dimensionals. Adhere with glue.
BEAN NOTES
  • Stamps: Friendship Set (JustRite Stampers)
  • Ink: Memento Tuxedo Black (Tsukineko)
  • Card Stock: Basic Black, Riding Hood Red (Stampin' Up!)
  • Fibers: Riding Hood Red Satin (SU!); Ivory Felt (Papertrey Ink)
  • Dies: Classic Heart Nestabilities (Spellbinders)
  • Accents: Ruby Red Liquid Pearls (Ranger)
HAPPY BEANS
  • Tools: Cricut Tags, Bags, Boxes & More Cartridge (Provo Craft)
  • Dies: Bigz 3-D Flowers (Sizzix)


Baby, You Rock!...

to view an image up-close, please click on the photo

Today is the Taylored Expressions Blast From the Past Blog Hop, and I have a fun baby gift set to share. I was inspired by one of my absolute favorite TE sets, You're My Hero, which always reminds me of my own little guy, who loves to play his "guitar" (a pint-sized ukulele). This is a card and a gift card holder for the "rockin'" bundle of joy. If you've hopped in from Pattie Goldman's fab blog, I'm glad you stopped by...enjoy!


First up is the baby card, which I did in some fun "non-traditional" colors. Here are the details:

SPILLING THE BEANS
  1. Make card from card stock; round corner.
  2. Stamp background and sentiment.
  3. Stamp guitar body and neck on card stock. Color with glitter and metallic pens. Fussy cut and assemble; adhere with foam tape.
  4. Affix letters to spell "baby,".
  5. Tie bow and adhere.
BEAN NOTES

  • Stamps: You're My Hero (Taylored Expressions)
  • Dye Ink: Memento Tuxedo Black (Tsukineko)
  • Card Stock: Concord Crush, River Rock, Peach Parfait, Pear Pizazz (Stampin' Up!); Solar White (Neenah)
  • Specialty Ink: Encore! Bronze Metallic (Tsukineko)
  • Fibers: Purple Satin Ribbon (Kate's Paperie)
  • Stickers: Glitter Alphabet (Pink Paislee)
  • Tool: Corner Chomper (We-R-Memory Keepers)
HAPPY BEANS

To match my baby card, I couldn't resist this rocked out gift card holder, which is a template available from Taylored Expressions. I made sure to match the colors up and, do you see that little pacifier hung from the ribbon? I created that from some punches in just a few quick steps.

SPILLING THE BEANS
  1. Print template, trace onto card stock; trim pieces.
  2. Adhere flames to body.
  3. Apply liquid dimensionals.
  4. Draw strings and frets with metallic pen. Adhere gemstones.
  5. Punch ovals for pacifier. Assemble with glue and attach with ribbon. Tie bow.
  6. Punch border on inner pocket piece.
  7. Assemble.
BEAN NOTES
  • Card Stock: Crushed Concord, River Rock, Peach Parfait, Pear Pizazz (Stampin' Up!)
  • Specialty Paper: Green Glittered Card Stock (The Paper Co.)
  • Fibers: Purple Crinkled Crepe Satin (Taylored Expressions)
  • Accents: Clear Gemstones (Hero Arts); Terra Cotta Liquid Dimensionals (Adirondack)
  • Color Medium: Silver Metallic Pen (Sakura); Cool Gray Multiliner (Copic)'
HAPPY BEANS
I hope you liked my baby project! Now, hop on over to the uber-talented Jen Tapler's blog for a terrific project! Thanks for stopping by, and if you missed any of today's Blast from the Past, just following the link list below. Enabler Alert!: TE is offering a special Blast from the Past sale to get revved up for next month's Hop, which will be a look back at past Christmas sets. So, from now through Sunday, September 26, select sets will be 20% off. Those sets are:
Christmas Blessings
Season's Sweetings
Home Sweet Home
Holiday Wonder
Wings of Joy
Tag Treats

Have a rockin' day!


Monday, September 20, 2010

So Tweet...

to view the image up-close, please click on the photo

It's a happy Monday, which means it's time for another sketch from 2 Sketches 4 You. This week's the lovely Laura has come up with a really fun one and I hope you will all play along. If you haven't checked it out, you should know that there are some pretty terrific prizes in store for a talented paper-crafter selected as Card of the Week!

I decided I wanted to make a card to send to my mom-in-law, Susan. I usually wax poetic about how fabulous she is, so this time I thought I'd let my card do it for me. Susan LOVES birdhouses, so this digi-stamp from this week's sponsor was just perfect! Here are the details:

SPILLING THE BEANS
  1. Make card from card stock. Trim along bottom edge. Border punch card stock and adhere.
  2. Print dig-stamp, color, and trim. Re-print twice; color bird and wing. Fussy cut bird and adhere with foam tape.
  3. Trim blue card stock. Adhere bird panel. Attach ribbon and button. Adhere to card.
  4. Stamp sentiment. Punch and trim. Adhere with foam tape.

I hope you all have a "tweet" week!

BEAN NOTES
  • Digi-Stamp: Waking Up Birdie (Robin's Fetish)
  • Stamps (sentiment): Tweethearts (Taylored Expressions)
  • Card Stock: Crumb Cake, Bashful Blue, Real Red (Stampin' Up!); Solar White (Neenah)
  • Ink: Fresh Snow Hybrid (Papertrey Ink)
  • Coloring Medium: Sketch Markers (Copic)
  • Tools: Border Punch (SU!); Designer Label Punch (SU!)

HAPPY BEANS
  • Fibers: Real Red Taffeta Ribbon (SU!); Hemp Twine (generic)
  • Accents: Pure Poppy Button (PTI)

Saturday, September 18, 2010

Upcoming Fun...


Happy Saturday! Next week is shaping up to be a big one here on TSB and I hope you mark your calendars. I thought I'd share a few sneakie peekies of all the upcoming fun...
  • Monday, September 20: 2 Sketches 4 You - Have you given this challenge a whirl yet? If not, I hope you do as it's always fun and your project might just win some fun prizes if chosen as Card of the Week. We hope you join us!
  • Tuesday, September 21: Taylored Expressions Blast From the Past Blog Hop - I love this monthly blog hop, and this month I have a rockin' baby gift set that is perfect for the "non-traditional" bundle of joy. Come hop along and be inspired!
  • Wednesday, September 22: Perfect Pair Blog Hop - Clear & Simple Stamps and Creative Cuts & More have teamed up for a very cool hop showcasing the perfect pairing of stamps and die cuts. Pssst...there will be some fabulous prizes so come join in the fun! (I'll also be revealing a big secret that I've been just itching to let out!)
Thank you so much to everyone who left me feedback about my new "Spilling the Beans" card detail feature. I really appreciate it! Have a wonderful, lovely weekend and I'll see you back here next week!


Friday, September 17, 2010

For the Newlyweds...

to view the image up-close, please click on the photo

After some freak storms yesterday, I felt like creating something sunny and happy. The fun sketch over at Everything But the Kitchen Sink is one that leaves a lot up to interpretation, and so here is mine! For this card for a pair of sweet newlyweds, I began with an image from one of my favorite Taylored Expressions sets, Wings of Joy. It's a Christmas set, but with a little tweaking, it was perfect for a wedding card.
I'm going to try out something a bit new today. We are all pressed for time, so I thought I'd include details on this card in a new format, called "Spilling the Beans." I'd love to know if you prefer my usual narrative or if you like this new list format, so please leave me a comment telling me what you think. You are the reason TSB exists, so your opinion matters!

SPILLING THE BEANS

  1. Make card from card stock.
  2. Trim patterned paper and mat with cardstock; border punch and adhere card stock, tie ribbon, and adhere.
  3. Stamp birdcage and color birds and heart; punch heart from card stock, color, and adhere. Adhere to card with foam tape.
  4. Stamp sentiment.

BEAN NOTES

  • Stamps: Wings of Joy (Taylored Expressions); Teeny Tiny Wishes sentiment (Stampin' Up!)
  • Ink: Memento Rich Cocoa (Tsukineko)
  • Card Stock: Choice Snow White (TE); Crumb Cake, Chocolate Chip, Blushing Bride (SU!)
  • Patterned Paper: Blushing Bride In-Color (SU!)
  • Fibers: Stitched Grosgrain (generic)
  • Coloring Medium: Sketch Marker RV11 (Copic)

HAPPY BEANS

  • Tools: Small Heart Punch (SU!); Cornice Border Punch (Martha Stewart Crafts)

Tuesday, September 14, 2010

Christmas is Just Around the Corner...

to view an image up-close, please click on the photo

With the California-like weather we are experiencing in New York, it is hard to imagine Christmas coming soon, but it will be here before we know it. I thought I should get a good head start on my gift giving this year and this week's Friday Challenge: Christmas in September seemed to prove me right! I thought I'd change things up a bit and make something other than a card, and the Moxie Fab World All Wrapped Up Challenge was the perfect excuse to make a gift bag.


I began with this wonderful image of Santa Claus, which was originally just his face. I have always loved the story of how the big guy squeezes himself down chimneys and decided to draw in the rest of him doing just that, popping the original image out over for some dimension after coloring in with Copics. Next, I framed him with this pretty holly border, coloring in and accenting everything with some glitter and metallic pens. I matted some nice Kiwi Kiss patterned paper (it's old enough that, I'm sorry to say, I have no idea from where it came from!) along with a Purely Pomegranate punched border. I added a nice satin bow, complete with button, from which I hung a Christmas tag: I hope we are ALL blessed his holiday season, which is really just around the corner!

BEAN NOTES
  • Stamps: Old Fashioned Christmas, Christmas Nested Frames & Occasions, and From Our House (Just Rite)
  • Ink: Ripe Avocado Hybrid (Papertrey Ink) and Memento Tuxedo Black (Tsukineko)
  • Card Stock: Kiwi Kiss, Purely Pomegranate, and Bordering Blue (Stampin' Up!) and Solar White (Neenah)
  • Patterned Paper: Kiwi Kiss (unidentified SU!)
  • Tools: Border Punch (EK Success)
  • Fibers: Olive Satin Ribbon (Kate's Paperies); Hemp Twine (generic)
  • Dies: Classic Circle Nestabilities (Spellbinders)
  • Coloring Medium: Sketch Markers (Copic)
HAPPY BEANS
By the way, have you signed up for the Taylored Expressions Blast From the Past Blog Hop? Well, if you haven't, you have until Thursday, September 16. One lucky participant in the Tuesday, September 21 Hop will win a TE stamp set! Come play with us by signing up HERE!

Just Like You...

to view an image up-close, please click on the photo

A crafty and talented friend of mine, Nina Dee, is hosting a fun butterfly button challenge and I wanted to give it a whirl. I used this week's Mojo Monday sketch, which was just perfect for what I had in mind.  I began with cutting out just the wings of the butterfly from a piece of vellum to pop them up, lined them with some sweet little buttons, and then tied some pretty ribbon along the side. Next, I cut strips of some fun patterned paper and adhered them onto Marina Mist. Then, I stamped a nice sentiment on a strip of card stock (plus a few pearls) and I was all done with a sweet little card to tell someone "thanks!"

BEAN NOTES
  • Stamps: Big & Bold Wishes (Papertrey Ink)
  • Ink: Marina Mist Classic Dye (Stampin' Up!)
  • Cardstock: Marina Mist, Soft Sky, and Whisper White (SU!)
  • Patterned Paper: Marina Mist Patterned, Baja Breeze Patterned, Unidentified (SU!)
  • Specialty Paper: Vellum (PTI)
  • Accents: Pearls (Kaisercraft)
  • Fibers: Marina Mist Taffeta Ribbon (SU!)
HAPPY BEANSPublish Post

Monday, September 13, 2010

Thank You...

to view an image up-close, please click on the photo

After a lovely weekend, it's time to get back into the swing of things. What better way than with a new 2 Sketches 4 You sketch from the superbly talented Ms. Kazan? For this week's sketch, the Design Team got to work with some deliciously wonderful stamps and we hope you will join us and play along!

I began by rotating the sketch sideways and stamping just a portion of this elegant rose image in three different shades of pink. To achieve the lightest shade, I actually stamped the medium shade once on scratch paper and then again on my card stock panel. Next, I stamped the simple sentiment in Crumb Cake directly over the roses and matted the panel in match card stock, ticket punching the corners. I then created the ribbon treatment by pleating some pretty taffeta ribbon. A line of delicate pearl accents completed my card, and I took it as a good sign that this week will be pleasant!
BEAN NOTES
  • Stamps: Backlit Blooms Rose and 'Thank You" (Starving Artistamps)
  • Ink: Sweet Blush and Scarlet Jewel Hybrid Ink (Papertrey Ink); Crumb Cake Classic Dye
  • Paper: Crumb Cake, Whisper White, and Blushing Bride Card Stock (SU!)
  • Fibers: Kraft Taffeta Ribbon (SU!)

HAPPY BEANS
  • Accessories: Ticket Corner Punch (SU!); Pearls (Amuse)