Showing posts with label Gift Giving. Show all posts

Thursday, November 6, 2014

Taylored Expressions Release Day: Season of Giving


Woo-hoo! It's Release Day at Taylored Expressions and I got to play along with my friends on The Baker's Dozen. I have some fun tags and a Christmas card to share with you today! 
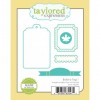
For my first project, I created some fun tags with the new Build a Tag 1, which just may be my favorite new die. It makes the sweetest little tags!


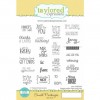
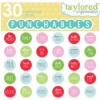
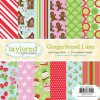
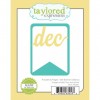
First up is one for the holidays. I used TE's Gingerbread Lane patterned paper for my background and I absolutely love how the die cuts the "stitches" in the frame. I also used TE's new Punchables - Christmas pre-printed sheets and punched out the "Spread Cheer" sentiment. It was so easy and made the tag go fast, fast, fast. I finished off with the "Just for You" sentiment stamped inside the die-cut banner from Small Packages. And don't forget the pretty ribbon!


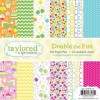
My next tag is similar, but this time, I created a tag for a birthday (you can never have enough of those around!) I again used a sentiment from Small Packages and then added one of the new Skinny Mini Borders along the bottom. So wee and cute! I also added a Little Bits Present to really make things Festive, matching it to the Double the Fun patterned paper from TE.


My next project was a Christmas card. I chose bright, bold colors because I really wanted it to pop. I used the new Pockets & Pages 3x4 Banner w/Bonus die - the bonus? That cool "dec" die cut! 


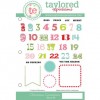
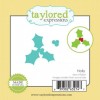
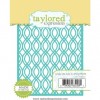
I paired the banner frame with the new and very chic looking Loop-de-loo Cutting Plate and added a Little Bits Holly for just a pop of green. The numbers and the "No Peeking" sentiment are from the previously released Christmas Countdown. 

All new products are now available in the TE Store! Be sure to visit the TE Blog for a list of all my buddy designers for tons of Release Day inspiration!
Monday, August 5, 2013

Core-dinations & Imaginisce Week-long Blog Hop!


Happy Monday! If you are here from the fabulous Debbie Standard's blog, you are in the right place because Imaginisce and Core'dinations are teaming up all this week for a fun and crafty blog hop!

For my hop project, I really wanted to create something using a photo of the rugrat from his first trip to a planetarium. We got a great shot of him looking for Jupiter though a giant telescope and I decided that, instead of a traditional layout, I would make a frame that he could keep in his room.


I used one of the awesome stickers from the Outdoor Adventures collection from Imaginisce and paired it with the absolutely darling Spotted Core'dinations embossed cardstock. After sanding the embossed dots with the cool sanding tool, I was left with a terrific textured background paper that was perfect for my dual frame. I also die-cut some stars from the cardstock to go along with my project, which added more visual interest. 


BEAN NOTES
(patterned paper, sticker from Outdoor Adventures collection) Imaginisce; (embossed card stock ) Core'dinations; (kraft card stock) Stampin' Up!; (star dies) Taylored Expressions; (frame digital cut file) Lori Whitlock

And you can't have a blog hoppy party without an awesome prize, can you? Here's what Imaginisce and Core'dinations are giving away: Imaginisce: Tool Kit and POGO adhesive and Core'dinations: Glitter Silk collection, Black Magic collection and Sand It Gadget! Visit the Imaginisce blog for details!


Now, off you go to my wonderful teammate, Guiseppa's, blog for more inspiration. If you get off track, you can always head for the Imaginisce or Core'dinations blogs, too!


Core' Team:

Imaginisce Team:


Thursday, May 16, 2013

Cardmaker to Cardmaker


This week, my teammates and I at Imaginisce are showing off projects made with the cool tool, the i-Top. I got to play with Brad Daddies and boy, did I have a grand time!


I love coordinating products -- it makes creating something so much easier and really takes a lot of the guesswork out of finding the right colors, matching patterns, etc. It's one of the reasons I love using my i-Top and Brad Daddies. I can create perfectly coordinated embellishments from whatever patterned paper I happen to be inspired to use.


I have several friends who are dog lovers and who are also cardmakers. I thought it would be fun to put together a coordinated card kit for them to use to create multiple complimentary cards. Using the Good Dog collection and my own stash of twine and card stock, I had many of the right elements, but what the kit really needed was some cute coordinating embellishments. So I made my own using the i-Top punch, the i-Top, and Brad Daddies!


I put all the brads on a card back and placed everything inside a sturdy plastic box. It was enough for my dog loving friend to create 6 cards! The card kit idea will work with any collection, so now I'm off to create some for my surf, treehouse, and birthday-loving friends!


BEAN NOTES
(patterned paper from Good Dog collection) Imaginisce; Cardstock (various colors) Stampin' Up!; Fibers: (twine) The Twinery; Tools: (i-Top Punch, i-Top, Brad Daddies) Imaginisce; (Heart Punch) Stampin' Up!; Other: (plastic box) Taylored Expressions

I hope you enjoyed my fun card kit project. Be sure to check out the Imaginisce blog for more inspiration on what you can do with the i-Tool and Brad Daddies! Plus, Imaginisce is doing a cool giveaway and you could win an i-Top and accessories of your very own, so visit them for details!

Tuesday, April 23, 2013

It's All in the Twine


Happy Tuesday! If you are joining me today from the fabulous Jenny McGarvey's blog, then you know that all week long we gals at Imaginisce are hopping along with the awesome design team at The Twinery! We're all playing together this week to show off some fun and creative ways to combine Imaginisce and The Twinery's delightful baker's twine! Plus, to make things even more fun, we've got a giveaway -- keep reading for details.


As you can see from my first photo, I decided to make a pair of dangling twine earrings. I absolutely adore the color of the twine The Twinery sent us to play with, so I think I'll be making several pairs of these. These were made with Caribbean. I wanted to make them a gift, so I created a little gift box to go with them.


I used small Magnet Daddies, i-Top Earrings Kit, Hot Rocks and my i-Top tool to create these cuties. These were so quick, I was done in less than 20 minutes! It actually took me longer to create the gift box!


Here is a mini photo tutorial on how I created the twine portion of the earrings:

The finished product, just to give you an idea of what you are aiming for.
To adhere the twine to the Magnet Daddy, I used a square piece of an adhesive sheet. I simply applied the sticky side to the top of the Magnet Daddy and pressed down for even coverage.
Beginning in the middle, I set down the twine in a swirl pattern. If it didn't come out right, it was easy to simple unwind the twine before it set and start again.
After tucking the end of the twine underneath, I used the i-Top tool to seal it.
Imaginisce is celebrating our hop with The Twinery with a prize! It's a cool one: the Endless Summer collection, an i-Rock and Hot Rocks. Simply hop along with us all week and a winner will be chosen at random -- the more love you leave the more chances you have to win!

BEAN NOTES
Cardstock: Dotted textured (Core'dinations), white (Neenah); Fibers: Caribbean Baker's Twine (The Twinery), wired ribbon (Kate's Paperie); Tools: i-Top, i-Rock, Hot Rocks, Magnet Daddies (small), Magnet Earrings Kit (Imaginisce); Digital File: jewelry gift box cutting file (Rivka Wilkins for Silhouette)

Now, keep hopping for more twined inspiration by visiting the super creative Stacy Rodriguez HERE. If you get off track, you can always get back to hopping today with this list below. Or, visit the Imaginisce blog all week long!


Tuesday, January 29, 2013

Good Dog!


It's Good Dog Release Week at Imaginisce and I am so tickled to get to share two projects with you today! While I don't have a dog, we know many, many dog lovers and I was glad to see a collection with which I could create things for all my dog-crazy friends! For my first project, I created a Side Step card (tutorial can be found HERE), to which I added the absolutely adorable Doggy Diecuts. The "I {Heart} Dogs" sentiment stamp was pretty perfect for this puppy and I know of several friends who will be delighted to receive this card!


Next up, is a fun project that would make a great gift for any dog lover!


My brother-in-law and his wife own a basenji named Maya, who is a very sweet and energetic little dog. They love her and I thought I would put together a few of their favorite photos of her and create a little accordion frame to display on their mantle. The frame is just a piece of 8.5" x 11" cardstock scored in four equal parts and trimmed down to fit 1.75" square photos. 


I took apart some of the sweet little Doggie Diary Sticker Stacker stickers to embellish the frame and spelled out Maya's name using the bright and fun patterned paper from the collection.


I hope you enjoyed my Good Dog projects. Be sure to visit the Imaginisce blog to see more of my teammates' creations! They are pretty doggone cute!

BEAN NOTES
I {HEART} DOGS Card
Patterned Paper: Dog Parade, Paw Prints, Dog Dreams from Good Dog Collection (Imaginisce); Stamps: I Heart Dogs Snag'em Stamp (Imaginisce); Cardstock: Crumb Cake (Stampin' Up!); Accents: Stickles (Ranger); Dies: Classic Circle, Scallop Circles (Spellbinders)

MAYA Accordion Frame
Patterned Paper: Paw Prints, Dog Parade, Dog Biscuits, Dawg Days, Dog Speak from Good Dog Collection (Imaginisce); Stickers: Doggie Diary Sticker Stackers (Imaginisce); Fibers: red twill ribbon (generic); Dies: Merry Alpha Dies (Lifestyle Crafts); Cardstock: Pacific Point, Real Red (Stampin' Up!); Accents: Stickles (Ranger)