Showing posts with label 2S4Y. Show all posts

Monday, January 17, 2011

If You Can Dream It...

to view the image up-close, please click on the photo
Today is a big day, as it is the very last Monday for 2 Sketches 4 You. The inimitable duo behind this wonderful sketch challenge, Kazan Clark and Laura Davis, are moving on to do some big creative things, and have decided to end 2S4Y. It's both sad and exciting at the same time, and I have had a fantastic time designing for them -- and made some friends to boot! But, in keeping with their class-act style, the 2 Sketches site will remain up for anyone in need of some creative mojo. For their final farewell, we are all celebrating with a huge blow-out with designers past and present and I hope you join  in the fun!


I chose Kazan's sketch (check out Laura's sketch here!) and I made a card to wish both of them good luck in their new endeavors. I love this sentiment from Taylored Expressions's New Beginnings set: "If You Can Dream It, You Can Do It." I thought it a fitting tribute to these two amazing ladies who are dreaming big dreams and I know they'll all come true!

SPILLING THE BEANS
  1. Make card from cardstock.
  2. Trim patterned paper; mat with cardstock and adhere.
  3. Die-cut cardstock; trim and adhere. 
  4. Stamp rose twice. Fussy cut center to form bud. Fussy cut inner center and adhere with foam tape; adhere.
  5. Pleat ribbon and adhere with sticky tape. Tie bow and adhere.
  6. Stamp sentiment on patterned paper. Trim, mat and attach staples. Adhere with foam tape.
  7. Apply liquid pearls.
BEAN NOTES
  • Stamps: New Beginnings (Taylored Expressions)
  • Cardstock: Choice Buttercream (TE); Chocolate Chip (Stampin' Up!); Hazel and Aqua Canvas Texture (Bazzil)
  • Ink: Memento Rich Cocoa (Tsukineko)
  • Patterned Paper: Brook (Crate Paper)
  • Accents: Tiny Attacher Staples (Tim Holtz); Espresso Liquid Pearls (Adirondack)
  • Fibers: Chocolate Grosgrain (generic)


Monday, November 29, 2010

A Simple Little Tag for You...

to view the image up-close, please click on the photo
I hope everyone is recovered from a gluttonous Thanksgiving! It's been an amazing few months for me on the 2 Sketches 4 You Design Team. I've gotten to know some amazing and talented ladies and been inspired by their gobs and gobs of creativity. We're taking the rest of the year off as all of us, Kazan and Laura included, gear up for the holidays. So, this week, Kazan has a simple tag sketch to help us all with our holiday giving. Until next year (gulp!) you can visit the 2S4Y site for some taggy inspiration.
For my tag, I used some of my fave holiday sets from Taylored Expressions and paired them with the super-fast-and-easy coordinating dies. I figure I can churn these out by the bucket loads while snuggled up indoors before Christmas!

(Pssst! Tune in tomorrow for some fun news and a giveaway!)

SPILLING THE BEANS

  1. Stamp frame and sentiment on cardstock. Die cut.
  2. Cut slit in frame with hobby blade. Thread ribbon and tie bow.
  3. Stamp snowflake on cardstock; die cut. Adhere with strong adhesive.
  4. Adhere gemstone.
  5. Punch hole and thread baker's twine. Tie off.
BEAN NOTES
HAPPY BEANS
  • Accents: Tiny Twinkles (TE)


Monday, November 22, 2010

A Warm & Cozy Christmas...

to view the image up-close, please click on the photo

Oh, it's beginning to look a lot like Christmas! Okay, okay, it still isn't even Thanksgiving, but can't you feel the excitement? This week 2 Sketches 4 You's Laura came up with such a fabulous sketch, and the Simon Says Challenge is "Sparkle" -- what a perfect combination for some holiday fun! I used some adorable images from JustRite to create a little snowy scene for a sweet snowperson and stamped the pretty snowflakes in the background. A bit of felt for fluffy snowbanks and the "sparkle" of some twinkly gemstones make a row of cocoa-filled mugs that much more cozy! By the way, tune back in this Wednesday, November 24 for a JustRite Christmas Hop, when I'll be sharing a gift idea sure to light up your holidays. Thanks for stopping in today!

SPILLING THE BEANS
  1. Make card from cardstock.
  2. Emboss snowflakes on front panel.
  3. Trim pink cardstock. Tie ribbon and add button. Adhere.
  4. Trim patterned paper. Adhere.
  5. Stamp snowflakes and sentiment on cardstock. Trim and adhere.
  6. Trim felt and adhere.
  7. Stamp snowperson; color with markers. Adhere.
  8. Apply gemstones.
BEAN NOTES
  • Stamps: Sparky & Friends Cling (JustRite Stampers)
  • Ink: Memento Tuxedo Black (Tsukineko); Aqua Mist (Papertrey Ink)
  • Cardstock: Aqua Mist (PTI); Melon Mambo (Stampin' Up!); Solar White (Neenah)
  • Patterned Paper: Jolly By Golly (Cosmo Cricket)
  • Accents: White Felt (generic); Button (generic)
  • Fibers: Ecru Organza Ribbon (Kate's Paperie)
  • Templates: Snowflake Embossing Folder (ProvoCraft)
  • Coloring Medium: Sketch Markers (Copic)
HAPPY BEANS
  • Accents: Tiny Twinkles (Taylored Expressions)


Monday, November 15, 2010

Happy, Happy, Joy, Joy...

to view the image up-close, please click on the photo
It was a warm (for Manhattan in November) weekend and we had a few outdoor frolics before winter sets in. I did manage to squeeze in a little creativity for this week's 2 Sketches 4 You sketch challenge. I got to play with a fun card kit from this week's sponsor, and if you have a chance to play, you could win a fun prize! Ms. Kazan put forth another terrific sketch and I came up with a festive little holiday card. 


SPILLING THE BEANS
  1. Trim patterned paper, adhere cardstock strip. Attach pearl string with glossy accents (or similar strong adhesive.)
  2. Adhere ribbon. Tie bow, attach felt star. Spell out "JOY" with stickers. Tag punch, draw stitching, and adhere.
  3. Mat with cardstock and adhere to pre-made card base.
BEAN NOTES
  • Stickers: Glitter Alphabet (Making Memories)
  • Cardstock: Parakeet and LagoonTextured (Bazzil); Card Base from Card Kit (Cupcards to Go)
  • Tools: Small Tag Punch (Stampin' Up!)
  • Patterned Paper: from Card Kit (Cupcards to Go)
  • Accents: Ribbon, felt star, and pearl string from Card Kit (Cupcards to Go)
HAPPY BEANS
  • Coloring Medium: Silver Metallic Pen (Sakura)

Monday, November 8, 2010

JOY...

to view the image up-close, please click on the photo

Well, after a completely crazy weekend of toddlers and cake, my son's third birthday is finally over! I don't know if I am sad or relieved. The best therapy? What else? Make a card. So, the perfect excuse was this week's cool sketch from the lovely Laura at 2 Sketches For You. I got to use some pretty stamps and a stencil (something new to try!) Need some mojo in your day? Head over to 2S4Y and give it a whirl...you just might win a prize, but, if anything, you'll find a good reason to create.

SPILLING THE BEANS
  1. Make card from cardstock.
  2. Trim cardstock. Stamp "JOY" and ornament. 
  3. Sponge ink using stencil. Trim.
  4. Emboss cardstock. Sweep ink pad lightly over raised dots. Trim.
  5. Adhere all three panels onto red cardstock. Adhere ribbon.
  6. Trim white cardstock. Border punch and adhere.
  7. Adhere panel sheet onto card.
BEAN NOTES
  • Stamps: Fruitful Harvest (Layers of Color); alphabet clear stamps (Anna Griffin)
  • Ink: Fresh Snow Hybrid (Papertrey Ink)
  • Cardstock: Riding Hood Red, Whisper White (Stampin' Up!)
  • Templates: Swiss Dots Embossing Folder (ProvoCraft); Botanical Swirls Stencil (Layers of Color)
HAPPY BEANS
  • Fibers: Real Red Taffeta Ribbon (SU!)


Monday, November 1, 2010

Happy Harvest...

to view the image up-close, please click on the photo
It's definitely Autumn and it's a lovely one here in Manhattan. We went apple picking a couple weekends ago and had a fantastic time. We are so lucky to get to do such fun things and share such good times with our friends and with each other. This week's 2 Sketches 4 You theme of Thankful/Thanksgiving  fits in just perfectly with that feeling. Uber-terrific Kazan has come up with a great sketch this week to get you in the mood for Fall and if your card is chosen as Card of the Week, you could win some fun goodies from this week's sponsor, whose owner is 2S4Y DT alum Kathy Martin! Today, I chose to use these darling apple digi-stamps and the cute and simple sentiment. I don't use a lot fo digi-stamps, but the more I do, the more I realize how versatile they are. For this card, I was able to take the images and manipulate them easily using Microsoft Word to create some background paper and a border strip...plus, talk about mess-free! I hope everyone has a Happy Harvest this year...I know I am so far.

SPILLING THE BEANS
  1. Make card from cardstock.
  2. Format digi-stamps in word processing program; print on cardstock.
  3. Punch label; adhere.
  4. Print sentiment on cardstock. Punch out and mat. Attach button and adhere with foam tape.
BEAN NOTES
  • Digi-Stamps: Apple, Apple Trio, Happy Harvest (Digital Doodles)
  • Cardstock: Solar White (Neenah); Poppy Parade, Crumb Cake (Stampin' Up!)
  • Tool: Decorative Label Punch (SU!); Circle Punch (EK Success)
HAPPY BEANS
  • Fibers: Hemp Twine (Jo-Ann Fabrics)
  • Accents: Button (generic)
  • Computer & Printer

Monday, October 25, 2010

Merry & Bright...

to view the image up-close, please click on the photo

Ooooh, it's another Monday, though it's really a very special one at my house. Today my little rugrat turns three! I can hardly believe that he is already in school and getting so gosh darn big. We are actually celebrating in a couple weeks so that his Nana and Papa can be here with us, so I'm not celebrating with a birthday card for today's 2 Sketches 4 You Challenge, but am instead featuring a Christmas card using stamps from this week's fun sponsor. Though, I hope you will indulge my showing off a couple then and now pics of my sweet baby boy. By the way, beginning in November, you will have some fresh inspiration from two very talented ladies (Mona Pendleton and Julie Lacey) who are joining the 2S4Y Design Team alongside myself (thank you, Kazan and Laura for inviting me to continue on the team...it's been a blast!) So, if you have a chance, check out today's challenge in which the Card of the Week will win a cool prize.


SPILLING THE BEANS
  1. Make card from cardstock.
  2. Trim red cardstock strip; adhere.
  3. Ruffle ribbon (pull one stitch taut and gather edge.) Adhere with sticky tape.
  4. Trim patterned paper; mat and adhere.
  5. Stamp poinsettias on white cardstock. Accent with metallic marker. Stipple ink background. Apply rub-on sentiment. Die-cut and apply Liquid Pearls. Adhere with foam tape.
BEAN NOTES
  • Stamps: Poinsettia (Starving Artistamps)
  • Ink: Real Red Classic Dye (Stampin' Up!)
  • Rub-On: Chit-Chat (SU!)
  • Cardstock: Certainly Celery, Real Red, Whisper White (SU!)
  • Patterned Paper: Tinsel & Twig (Girls Paperie)
  • Dies: Labels Seventeen Nestabilities (Spellbinders)
  • Accents: Rouge Liquid Pearls (Ranger)
  • Fibers: Pure Poppy Stitched Grosgrain (Papertrey Ink)
HAPPY BEANS
  • Coloring Medium: Red Metallic Marker (Sakura)

Monday, October 18, 2010

Peace, Joy, and a Bonus Sketch!...

to view the image up-close, please click on the photo

Today is a very fun Monday, as it's my first time ever designing a sketch! This week, at 2 Sketches 4 You, it's double the fun. Along with another of Kazan's fab sketches, we have a Bonus Sketch for you, designed by moi. I was so excited to find out that this week's sponsor is also Clear & Simple Stamps! So, head on over to the 2S4Y site and play along with either sketch for a chance to win some cool goodies.
Of course, I chose to play with the Bonus Sketch, and I was so happy to get to use what has become one of my favorite Christmas sets from CSS, O' Tree. It's clean and chic, and for this card, I took one of the Christmas trees and turned it into the 3-D main focus of my card. Now I am really getting into the holiday mood...and it's only October!

SPILLING THE BEANS
  1. Make card from card stock.
  2. Trim patterned paper and adhere.
  3. Trim green patterned paper. Mat with card stock and adhere.
  4. Trim card stock into square. Adhere. Attach brads.
  5. Punch three white squares from card stock. Stamp sentiments. Mat with card stock.
  6. Stamp Christmas tree three times on green card stock. Fussy cut and adhere together with glue. Adhere. Color star with glitter pen; fussy cut and adhere.
BEAN NOTES
  • Stamps: O' Tree (Clear & Simple Stamps)
  • Ink: Memento Tuxedo Black (Tsukineko)
  • Card Stock: Wild Wasabi, Rose Red (Stampin' Up!); Classic Solar White (Neenah)
  • Patterned Paper: Jolly Holiday (SU!)
  • Accents: Brads (Basic Grey)
  • Tools: Square Punch (EK Success)
HAPPY BEANS
  • Coloring Medium: Glitter Pen (Sakura)

Monday, October 4, 2010

Congratulations, Jodi!...

to view the image up-close, please click on the photo

It's Monday! The last months of the year are flying by and it's always good to get your creative mojo flowing with a good sketch. This week, 2 Sketches 4 You has one that is just ripe for interpretation. I have heard from several of you that you often feel intimidated by sketches and feel like you have to follow them to the letter. Fear not! This is simply not true. Sketches are just a terrific tool to get you going and, as you can see with my card today, you are free to interpret them to suit your fancy. Do you see that dark rectangular element in Laura's fab sketch? I just replaced it with a teddy bear for my baby card for my sweet Taylored Expressions Baker's Dozen Design Team member, Jodi Collins, who just had a baby girl last week! Be sure to stop by Jodi's blog for some terrific eye candy this week and to send her some good wishes. Congratulations, darling Jodi, and I hope you and baby are happy and healthy!

SPILLING THE BEANS
  1. Make card from card stock.
  2. Trim brown card stock and adhere. 
  3. Stamp border image along edges. Stamp sentiment.
  4. Trim patterned paper and adhere.
  5. Stamp frame on card stock; fussy cut. Color with marker, stamp hearts; attach bear sticker. Apply glaze marker dots.
  6. Die cut frame from card stock. Mat frame. Adhere with foam tape.
  7. Tie bow and adhere.
BEAN NOTES
  • Stamps: Take Note, Tweethearts, and Borderlicious (Taylored Expressions)
  • Chalk Ink: Dark Chocolate (Colorbox)
  • Dye Ink: Blushing Bride Classic (Stampin' Up!)
  • Card Stock: Blushing Bride, Chocolate Chip (SU!); Choice Snow (TE)
  • Patterned Paper: In-Color Patterns Pack (SU!)
  • Coloring Medium: Blushing Bride Stampin' Write Marker (SU!); Pink Glaze Pen (Sakura)
  • Fibers: Pink Pirouette Taffeta (SU!)
HAPPY BEANS

Monday, September 27, 2010

There's No Place Like Home...

to view the image up-close, please click on the photo

My little boy loves the book, The Wizard of Oz. I have to admit that, when I was a girl, I was afraid of the movie -- I mean, who wouldn't be frightened of flying monkeys? This week's 2 Sketches 4 You Sketch Challenge had us playing with some very fun repositionable stickers, and when I saw how adorable they were, any fears I had went right out the window!

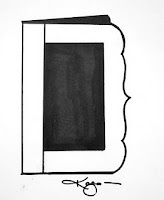
This week's sketch is from the ever fabulous Kazan, and I flipped it to create an "emerald" stage. I love the decorative edge of the sketch and I made that the top of card. Now I'm off to, what else? See the Wizard, perhaps?

SPILLING THE BEANS
  1. Make card from card stock.
  2. Sponge background on card stock. Adhere to card.
  3. Trim glittered card stock. Run pieces through crimper. Adhere with glue.
  4. Border punch glittered card stock. Adhere with foam tape.
  5. Trim glittered card stock. Adhere to bottom edge of card with foam tape.
  6. Apply stickers to white card stock. Trim around edges. Adhere to card with glue.
  7. Adhere sentiment stickers to white card stock. Trim in banner shape and adhere with foam tape.
BEAN NOTES
  • Stickers: The Wizard of Oz (EAD Designs)
  • Card Stock: Pear Pizazz, Whisper White (Stampin' Up!)
  • Specialty Paper: Green Glittered Card Stock (The Paper Co.)
  • Ink: Pear Pizazz Classic Dye (SU!)
  • Tools: Cornice Border Punch (Martha Stewart Crafts); Embossed Scallop Border (EK Success)

HAPPY BEANS
  • Tools: Paper Crimper (Fiskars)

Monday, September 20, 2010

So Tweet...

to view the image up-close, please click on the photo

It's a happy Monday, which means it's time for another sketch from 2 Sketches 4 You. This week's the lovely Laura has come up with a really fun one and I hope you will all play along. If you haven't checked it out, you should know that there are some pretty terrific prizes in store for a talented paper-crafter selected as Card of the Week!

I decided I wanted to make a card to send to my mom-in-law, Susan. I usually wax poetic about how fabulous she is, so this time I thought I'd let my card do it for me. Susan LOVES birdhouses, so this digi-stamp from this week's sponsor was just perfect! Here are the details:

SPILLING THE BEANS
  1. Make card from card stock. Trim along bottom edge. Border punch card stock and adhere.
  2. Print dig-stamp, color, and trim. Re-print twice; color bird and wing. Fussy cut bird and adhere with foam tape.
  3. Trim blue card stock. Adhere bird panel. Attach ribbon and button. Adhere to card.
  4. Stamp sentiment. Punch and trim. Adhere with foam tape.

I hope you all have a "tweet" week!

BEAN NOTES
  • Digi-Stamp: Waking Up Birdie (Robin's Fetish)
  • Stamps (sentiment): Tweethearts (Taylored Expressions)
  • Card Stock: Crumb Cake, Bashful Blue, Real Red (Stampin' Up!); Solar White (Neenah)
  • Ink: Fresh Snow Hybrid (Papertrey Ink)
  • Coloring Medium: Sketch Markers (Copic)
  • Tools: Border Punch (SU!); Designer Label Punch (SU!)

HAPPY BEANS
  • Fibers: Real Red Taffeta Ribbon (SU!); Hemp Twine (generic)
  • Accents: Pure Poppy Button (PTI)

Monday, September 13, 2010

Thank You...

to view an image up-close, please click on the photo

After a lovely weekend, it's time to get back into the swing of things. What better way than with a new 2 Sketches 4 You sketch from the superbly talented Ms. Kazan? For this week's sketch, the Design Team got to work with some deliciously wonderful stamps and we hope you will join us and play along!

I began by rotating the sketch sideways and stamping just a portion of this elegant rose image in three different shades of pink. To achieve the lightest shade, I actually stamped the medium shade once on scratch paper and then again on my card stock panel. Next, I stamped the simple sentiment in Crumb Cake directly over the roses and matted the panel in match card stock, ticket punching the corners. I then created the ribbon treatment by pleating some pretty taffeta ribbon. A line of delicate pearl accents completed my card, and I took it as a good sign that this week will be pleasant!
BEAN NOTES
  • Stamps: Backlit Blooms Rose and 'Thank You" (Starving Artistamps)
  • Ink: Sweet Blush and Scarlet Jewel Hybrid Ink (Papertrey Ink); Crumb Cake Classic Dye
  • Paper: Crumb Cake, Whisper White, and Blushing Bride Card Stock (SU!)
  • Fibers: Kraft Taffeta Ribbon (SU!)

HAPPY BEANS
  • Accessories: Ticket Corner Punch (SU!); Pearls (Amuse)

Monday, September 6, 2010

Faux Your Birthday (2S4Y)...

to view the image up-close, please click on the photo

It's Monday, which means another fun sketch from the lovely ladies at 2 Sketches 4 You. This week, Laura gives us a wonderful jumping off point with this simple and elegant sketch. The Design Team got to play with some beautiful ribbon and ribbon flowers this week, and we hope you can join us for some fun. We'd love to see how the sketch inspires you! For this card, I let the gorgeous ribbon flower be the star of the show. There is a certain shabby elegance to it, and, I'm not usually a shabby chic kind of girl. I admire it greatly, but don't do it very often, so this was a challenge! One way I was inspired was by my friend Ann Schach, an incredibly talented paper-crafter who showed off this gorgeous card using the faux burning technique. I thought I'd give it a try on my card, adding some distress ink along the edges of some pretty patterned paper. With a few pearls and a length of lacy black ribbon, I had a shabbily elegant birthday card once I'd stamped my simple sentiment.

BEAN NOTES: Papertrey Ink Round and Round Anniversary (sentiment) Stamp; Stampin' Up Chocolate Chip Classic Dye Ink; Tim Holtz Tattered Rose Distress Ink; SU Blushing Bride Patterned Paper; SU Basic Black and Blushing Bride Card Stock; Kaisercraft Champagne Pearls
HAPPY BEANS: Craftbrulee Ribbon and Ribbon Flower


Monday, August 30, 2010

On Top of the World...

to view the image up-close, please click on the watermark

This week is a big week for me -- I get to finally reveal a huge secret that I've been keeping, even though I wanted to shout it from the rooftops! To find out more, drop by later today or if you are a subscriber to TSB, check your inbox for my fun news...

In the meantime, the wonderfully fabulous Kazan has created another sketch for you over at 2 Sketches 4 You. Head over the to play and be inspired by all the beautiful creations by the Design Team!

For my take on the sketch, I turned it sideways and jumped off from there. This wonderful sentiment seemed to fit my "on top of the world" mentality, so this was particularly fun for me to create. I began by punching (a lot!) of hearts...I adore punches. Hey, I'm just a bit lazy and they do come out so perfectly. I used a die-cut circle as a guideline, layering and adhering all my little hearts into the shape of a globe. After stamping my sentiment and adding some ribbon and bling to my embossed background, I mounted two bright red heart "people." I'm feeling pretty much on top of the world right now. I hope you are too!

BEAN NOTES: Paper Makeup Stamps To the world (sentiment) Stamp; Papertrey Ink Pure Poppy Hybrid Ink; Stampin' Up Real Red Card Stock; Neenah Solar White Card Stock; Light Blue and Green Card Stock (generic); Hero Arts Gemstones; PTI Stitched Grosgrain Ribbon; Foam Tape
HAPPY BEANS: SU Small Heart Punch; EK Success Dotted Wave Border Punch

XOXO,

Monday, August 23, 2010

Sweet Shoppe...

to view the image up-close, please click on the watermark

This is my third week designing with 2 Sketches 4 You, and I'm having such a terrific time that I thought I would celebrate one of my Design Team members, Kelly Marie. She is so talented and amazing and I'm proud to be rubbing shoulders with her! For this week's sketch, designed by the fabulous Laura, I knew I wanted to use one of Kelly Marie's stamp images.
When I first saw the sketch, I was thrilled because I knew immediately what I wanted to do--make my own little "sweet shoppe." I began with the awning, trimming some cute patterened card stock and punching a pretty border punch along the bottom. I then scored lines to simulate fabric panels. For my storefront, I cut little cakes and cupcakes from some cute paper, adding a pink table in the window display. The outer walls are computer-generated with a brick pattern.
Finally, I stamped my sweet sentiment on Kelly Marie's banner...and isn't that what we love about stamping?...it just makes life sweeter!
Now, head on over to 2 Sketches for You and play along...the prize this week is a big one! The winner of Card of the Week will win a Guest Designer Spot at 2S4Y. Pretty sweet, yes? Happy crafting and good luck!
BEAN NOTES: Lawn Fawn Bannerific and Papertrey Ink Cupcake Celebration (sentiment) Stamps; PTI Sweet Blush Hybrid Ink; Memento Rich Cocoa Ink; DCWV Sweet Stack Designer Card Stock; Stampin' Up Baja Breeze Designer Series Paper; SU Baja Breeze, Very Vanilla, Whisper White, and Pink Pirouette Card Stock; Foam Tape
HAPPY BEANS: Martha Stewart Simple Scallop Border Punch; "Brick" Clip-Art (generic)

Monday, August 16, 2010

A Tweet Day (2S4Y)...

to view the image up-close, please click on the watermark

It's a happy Monday, indeed, when you get to have a nice fun weekend with your sweet hubby and funny rugrat exploring the Big City. A big thank you, by the way, to all of you who left me such sweet comments on my debut last week as a Design Team member for 2 Sketches 4 You. This week, Kazan has another fantastic sketch for you to play with, so head over there and give it a whirl.
When I saw this adorable little bird image and the sketch, I knew exactly what I wanted to do. First, I printed the happy guy onto some textured yellow card stock and added some color with Copic for some shading. Next, I free-cut a big branch and embossed it with an impression plate for texture. I cut out some leaves from patterened paper for a nice place for my birdie to frolic. After sponging some clouds into a big blue sky, I followed up with the perfect sentiment for how I was feeling, and I hope all of you have as "tweet" a day as I am!
BEAN NOTES: Ai Factory Digi-Stamps; Papertrey Ink Frost White Hybrid Ink; Taylored Expressions July Key Ingredients Designer Paper; TE Yellow Textured Card Stock; Stampin' Up Soft Suede Classic Dye Ink; SU Whisper White, Close to Cocoa, and Baja Breeze Card Stock; PTI Woodgrain, Clouds, and Medium Scalloped Border Dies; Big Shot; Foam Tape
HAPPY BEANS: Copic Sketch Markers