
 |
| With interchangeable photos and a tear-off calendar, this is a gift that will be useful throughout the year. |
Thank goodness it's Friday! I have had a crazy week with a sick rugrat and sleepless nights of worry, but now he's all better and I have some wonderful news to share. I have been a huge fan of Lifestyle Crafts (formerly known as QuicKutz) and I was so thrilled to be invited to become an Affiliate of this fabulous company. The best part is that all my readers get to benefit by receiving an exclusive 20% off coupon off purchased made in the LC store!
 |
| Enter the code: BEAN for your exclusive savings! |
It is going to be such a pleasure sharing with you some projects created with Lifestyle Crafts products, and I wanted to begin with this interchangeable photo calendar that was inspired by the Taylored Expressions Calendar Challenge. I was so in love with this project that I thought I would create a mini tutorial for anyone interested in making one:
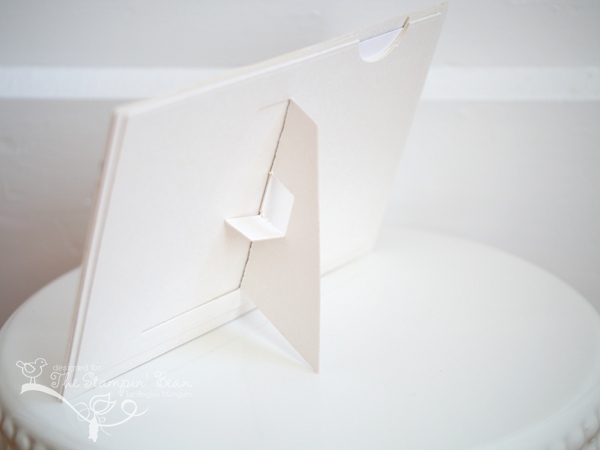 |
| A sturdy, precisely cut easel-back makes this perfect for display. It folds flat, which would make it easy to mail. |

I began by die-cutting the pieces to assemble my photo calendar stand from the very cool Card & Photo Easel Die. To make this extra sturdy, I used Craft-A-Board, which is a thin cardboard that runs through die-cutting machines using wafer-thin dies with ease.
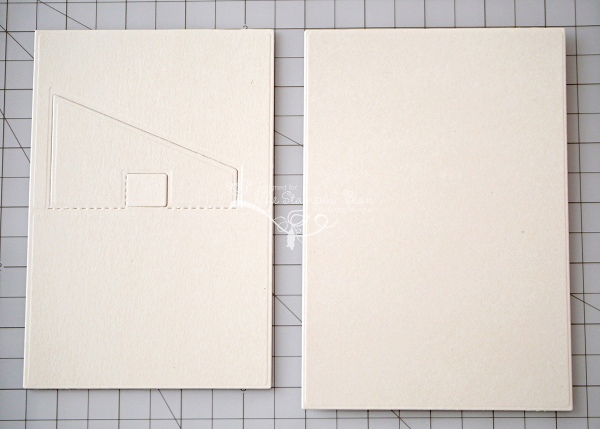 |
| You will want to cut two of the panel on the right in order to create the interchangeable photo frame. |
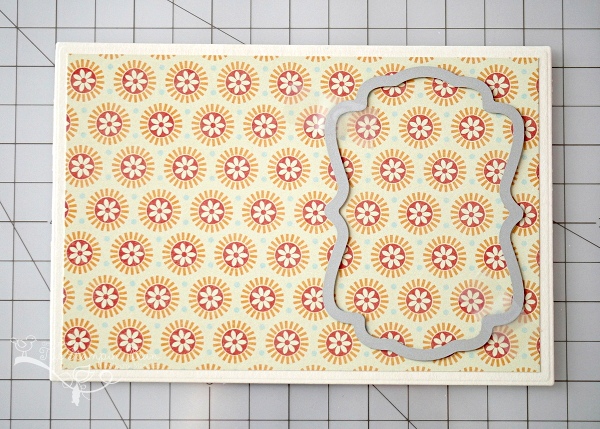 |
| After covering one panel with patterned paper, die-cut a frame using the included frame (BEAN TIP: use removable tape to secure your die in your desired spot.) |
 |
| Punch or die-cut a circle on the second panel. After trimming a photo to your desired shape, secure the two panels together using Scor-tape. Be sure to leave the top of the "pocket" free of glue/adhesive. |
 |
| Photos can be easily interchanged with the formed "pocket" between the two panels. Adhere the easel back piece after you have finished decorating your front panel. |

Print out as many photos as you would like, trimming to fit the pocket. For my project, I also added a fun Mini Tear-Off Calendar from Taylored Expressions. The Card & Photo Easel Die is so versatile that I think I'll be able to create a ton of other display and gift items, such as single- or multiple-photo frames, table toppers, and memo holders.

I hope you enjoyed my first "tutorial" -- I hope to do more in the future. I'm so pleased to be able to offer a discount for readers of TSB.
Have a Happy Bean Day!
BEAN NOTES
Patterned Paper: Blink of an Eye (My Mind's Eye)
Cardstock: Baby Blue Medium (Bazzill)
Specialty Paper: Craft-A-Board (Ellen Hutson)
Fibers: Ribbon (Stampin' Up!); Embroidery Floss (generic)
Calendar Product: Mini Tear-Off Calendar (TE)
Accents: Button (October Afternoon)

4 comments:
What great dies! Love this. Great job!
so cute (both the project and your little guy)! i love that it folds flat to mail as a precious gift. hugs, m
Super CUTE! Love the dies! ;o)
AWESOME tutorial! AWESOME project! Girl, I can feel the heat from here...cuz your blog is on FIRE! Love everything you're making lately! XOXOXO
Post a Comment