Friday, December 31, 2010

A Guy's Gratitude...

to view the image up-close, please click on the photo
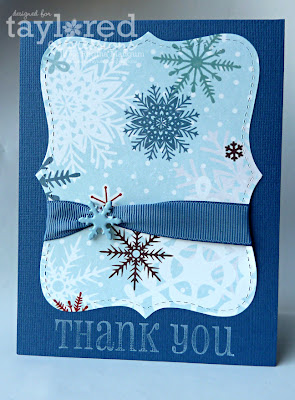
My husband came home one day, his arms filled with holiday gifts from colleagues and co-workers and asked me to make him some thank you cards that "weren't too girly." After I was done laughing, I sat down and made him several of the card I am sharing today. As I had so many to make, I was happy that I had just gotten my December Key Ingredients kit in the mail a couple days before! I found the patterned paper a perfect blend of pretty and neutral, and the colors were terrific for cards that would be more appropriate for a man to give. Now if only I could get him to actually write them...

SPILLING THE BEANS
  1. Make card from cardstock.
  2. Die cut top note from patterned paper. Adhere ribbon and tie with embroidery floss. Punch hole for snowflake brade and attach. Adhere.
  3. Stamp sentiment.
BEAN NOTES
  • Stamps: With Gratitude (Taylored Expressions)
  • Patterned Paper: Wintertime (Echo Park) from December Key Ingredients (TE)
  • Ink: Fresh Snow (PTI)
  • Fibers: Blue Grosgrain Ribbon from December Key Ingredients (TE)
  • Cardstock: Typhoon (Bazzil) from December KI Cardstock Kit
  • Dies: Top Note Bigz (Sizzix)
  • Accents: Snowflake Brad from December Key Ingredients (TE)

Thursday, December 30, 2010

Farewell, 2010...

to view an image up-close, please click on a photo
Tomorrow is New Year's Eve, and I can hardly believe that 2010 is drawing to a close. What an amazing year it has been, and this will mark our first full year in New York! I've had a wonderful time creating, making friends, and being inspired in the paper-crafting world. I was a top finalist in Gallery Idol, got published, and was invited to join some incredible design teams. I'm a little sad today, however, as my design team membership for Clear & Simple Stamps draws to a close. CSS is an amazing company, and they treated me with respect and kindness, and as if I was a member of a family.
My project today is my last "official" post for CSS, and I think it's appropriate that it is a calendar project as I look toward the future. I was lucky enough to get to use the Clear & Simple sets, Icons I and Icons Plus, which were the perfect pair with their 2011 Calendar Template!


After printing out the template, I stamped the icons and the fun borders on each calendar page before trimming. To assemble, I adhered a strip of 1/8" Scor-Tape (you can use any sticky tape adhesive), which makes it possible to peel off each calendar sheet.


Thank you so much, Clear & Simple Stamps, for helping to make 2010 such a wonderful year. And, to all my readers, may you all have bright and happy new years!

BEAN NOTES
  • Stamps: Icons I and Icons Plus (Clear & Simple Stamps)
  • Ink: Tempting Turquoise, Real Red, Soft Sky, Bleu Bayou, Peach Parfait, Perfect Plum, Bashful Blue, Wild Wasabi, Pretty in Pink, More Mustard, Crushed Curry Classic Dye (Stampin' Up!)
  • Cardstock: Dare to Be a Diva Red (CSS); Printer Paper (generic)
  • Patterned Paper: Celebration (SU!)
  • Dies: Classic Long and Scalloped Long Rectangle Nestabilities (Spellbinders)


Monday, December 27, 2010

Happy Birthday, darling Jodi!...

to view the image up-close, please click on the photo
My lovely fellow Baker's Dozen Design Team member, Jodi Collins, is celebrating a birthday, and a whole big bunch of us are helping her party with a birthday blog hop! Jodi is one of the most talented, creative, prolific, and sweetest women I've ever had the honor of knowing, and I hope she has a wonderful, fabulous, day.
For my card for Jodi, I decided to use the perfect b-day cake from the Make a Wish set from Taylored Expressions. I thought Jodi might need a little friend to help her blow out the candles on this topsy-turvy cake, so I added a tweety little birdie, drawing in a ladder for her to reach those sparklers. Now keep the party going by heading over to the wonderful Danielle Lounds's Fat Cat Stamper. If you get off-track, just head over to the uber-terrific Karen Motz's Paper Playhouse for the full list, and be sure to leave Jodi some birthday good wishes when you are through!

BEAN NOTES
HAPPY BEANS
  • Templates: Square Lattice Embossing Folder (Stampin' Up!)

Saturday, December 25, 2010

Merry Christmas...

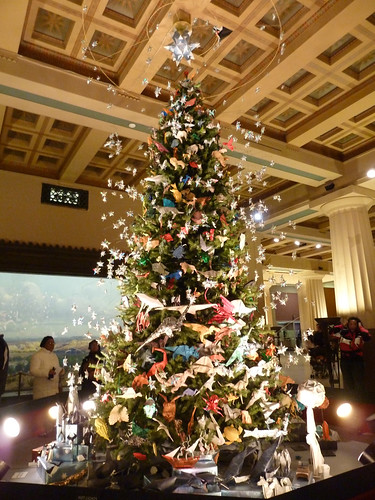
P1060280
Origami Christmas Tree at the American Museum of Natural History
I just wanted to pop in to wish you all a very Merry Christmas! I hope that you and yours are having a safe and happy holiday. I hope you were all on the "nice" list! Ho! Ho! Ho!


Friday, December 24, 2010

A Bit More...

to view the image up-close, please click on the photo

A very, very quick post today, as I have last minute Christmas shopping to do...for food this time, not for gifts, which are (finally!) all wrapped and ready to go! I had one more thank you card to make, this time for a lovely woman who gave the rugrat a fun toy for Christmas. He has so many gifts to open that we've been doing a modified "Twelve Days of Christmas" with him. I used this week's fab Pals Paper Arts sketch and some happy paper. The cute blooms are from a set called Much Appreciated from Taylored Expressions.

BEAN NOTES
HAPPY BEANS
  • Tools: Tim Holtz Tiny Attacher


Wednesday, December 22, 2010

Naughty or Nice?

to view the image up-close, please click on the photo
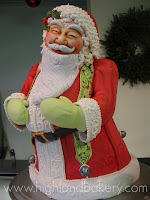
To celebrate the holidays with my fellow Baker's Dozen design teammates, we all made Christmas cards and mine uses the adorable Santa image from Take Note-Holidays from Taylored Expressions. I was inspired by the idea of Santa's list that he's checkin twice! My own name is on there, and I hope it doesn't fall into the 'naughty' side. May all of your holidays be merry and bright!

SPILLING THE BEANS
  1. Make card from cardstock.
  2. Print names on cardstock; trim into strips. Trim patterned and textured cardstock into strips. Assemble together and adhere to cardstock backing. Die cut.
  3. Te ribbon on die cut. Adhere to card.
  4. Stamp sentiment.
  5. Stamp Santa; color with markers. Fussy cut and adhere with foam tape.
BEAN NOTES
  • Stamps: Take Note-Holidays and A Year of Sweet Sentiments (Taylored Expressions)
  • Ink: Memento Tuxedo Black (Tsukineko)
  • Patterned Paper: Tinsel & Twig (Girls Paperie) from Tinsel & Twig Project Pantry Kit
  • Coloring Medium: Sketch markers (Copic)
  • Cardstock: Classic Solar White (Neenah); Parakeet, Maraschino (Bazzil); Kraft (PTI)
  • Fibers: Red Satin Ribbon (Kate's Paperie)
  • Die: Top Note Bigz (Sizzix)
HAPPY BEANS
  • Font: Amelie (www.fonts101.com)


Winter Thanks...

to view the image up-close, please click on the photo
I have so many people to thank during this time of year! This set of three thank you cards are for the three lovely administrators at my son's school. The "Anything Goes" Challenge at Simon Says Stamp is the perfect push for me to finish making them! Next up will be thank you cards for all the wonderful gifts that are already stashed in the closet to go under the tree. Lucky for me, "thank you" cards are my favorite to make!
Good Beans Spotlight: Okay, so I randomly picked up a Tim Holtz Tiny Attacher because I thought tiny staples might be a fun little accent. This has now become my absolute favorite tool in my craft drawer. I've used it to quickly attach tags, to accent, to adhere cardstock (such as in this card) and it has an amazing reach for such a little thing. If I didn't already have one, I would have loved to have gotten one in my stocking (yes, I do have a stocking, though I usually fill it  myself!) Happy Wednesday!

BEAN NOTES
  • Stamps: Thank You - limited edition (Clear & Simple Stamps)
  • Cardstock: Aqua Mist, Ocean Tides (Papertrey Ink)
  • Ink: Fresh Snow (PTI)
  • Patterned Paper: Jolly by Golly (Cosmo Cricket)
  • Dies: Classic Circle Nestabilities (Spellbinders)
  • Accents: Felt Flurries (Stampin' Up!); Buttons (generic)
HAPPY BEANS


Monday, December 20, 2010

Season's Greetings with a Twist!...

to view an image up-close, please click on the photo

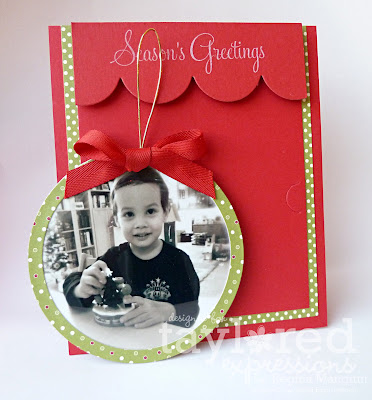
If you one of my lovely regular readers, you will know that I love cards that serve a dual purpose! When I saw this week's Cupcake Inspiration photo, I knew I wanted to make an ornament to thank my fabulous in-laws for a recent goody box. But, I really wanted to make a card, too. So, I decided to make both! This card holds the ornament (starring my little rugrat holding a Charlie Brown ornament from his Nana and Papa) and it can be removed to be hung on the tree.
I love a beautiful sentiment, and I used this big, lush one from Winter Wonderland by Taylored Expressions. I also created the awning with a cool scallop border die.


SPILLING THE BEANS
Card
  1. Make card from cardstock.
  2. Trim patterned paper; adhere.
  3. Trim cardstock; cut notches with tool. Adhere.
  4. Attach ornament.
  5. Die-cut scallop border. Stamp sentiment; adhere.
Ornament
  1. Die cut circle with chip board.
  2. Die cut patterned paper; adhere to back.
  3. Print photograph; die cut and adhere to chip board circle.
  4. Die-cut acetate and adhere.
  5. Die-cut patterned paper frame and adhere.
  6. Punch hole; string cord.
  7. Tie bow and adhere.
BEAN NOTES

  • Stamps: Winter Wonderland (Taylored Expressions)
  • Ink: (Fresh Snow) PTI
  • Cardstock: Real Red (Stampin' Up!)
  • Specialty Paper: Clear Acetate (generic); Craft-A-Board (Ellen Hutson)
  • Patterned Paper: Jolly Holiday (SU!)
  • Fibers: Gold Cord (generic); Pure Poppy Twill (PTI)
  • Tools: Notch & Die Cutting Tool (Basic Grey)
HAPPY BEANS


Saturday, December 18, 2010

Wee Games...

to view the image up-close, please click on the photo
There seems to be a plethora of new babies arriving in the homes of many of our friends and family. It's always such a happy occasion, and it gets me thinking about lots of baby "firsts." I thought I would create a fun little game for kids using the perfect-for-this-project Icons I from Clear and Simple Stamps.
I first created a simple template on my computer for the "BINGO" card (I know, it isn't really BINGO, but I figured that the simpler the better for these wee friends of ours). Next, I stamped the images in bright, fun colors. I then made a die by using the same images.


BEAN NOTES
  • Stamps: Icons I (Clear and Simple Stamps)
  • Cardstock: Poppy Parade (Stampin' Up!); A Blanc Check (CSS)
  • Ink: More Mustard, Poppy Parade, Pear Pizazz, Perfect Plum, Marina Mist (SU!)
HAPPY BEANS
  • Font: New Century Schoolbook (microsoft.com)


Friday, December 17, 2010

Snowflakes in Winter...

to view the image up-close, please click on the photo

I am finally nearing the end of my holiday appreciation gift-giving, and the last is for the rugrat's pediatrician. Technically, she is his doctor's nurse practitioner, and she is so warm and caring and absolutely amazing. I was inspired by the Friday Sketchers sketch challenge today and by the beautiful snowflakes in the Taylored Expressions Winter Wonderland set. I stamped several of the snowflakes to make some background paper and then applied Liquid Pearls to the largest for my focal image. I am pairing this card with some cocoa and a really huge mug to keep those wintery days warm and cozy.

BEAN NOTES

  • Stamps: Winter Wonderland (Taylored Expressions)
  • Ink: Soft Sky, Tempting Turquoise, Marina Mist Classic Dye (Stampin' Up!)
  • Cardstock: Choice Snow (TE); Hawaiian Shores (PTI), Soft Sky, Tempting Turquoise (SU!)
  • Fibers: Baker's Twine (The Twinery)
HAPPY BEANS


Thursday, December 16, 2010

A Boxcar of Goodies...

to view an image up-close, please click on the photo
I am a firm believer in gift cards, especially now that we live so far away from our friends and family and shipping costs a pretty penny! However, there is still something just a teensy bit impersonal about a gift card and I like to dress them up with a special card or packaging. My "Christmas Baby" dad-in-law is getting an auction site (can you guess which one?) gift certificate for Christmas, and I thought I would whip up a creative card to deliver it.
Our son's Papa is a big-time model train buff. He is also an architect, so you can imagine what his layout looks like! We thought we would feed his train habit and I wanted my card to reflect his fun hobby. I started by searching high and low for a train stamp in my stash and found an adorable little engine. But, I needed a box car and a flat-bed car (if I sound like I know what I'm talking about, I don't...I'm just using terms that seem correct!) So, I decided to draw my own, using the wheels from the engine as a base for each for consistency. I colored everything in with bright colors and added a sparkly and festive Christmas tree. It's a long card and I finished off with a homemade envelope.

BEAN NOTES
  • Stamps: engine from Oh Boy! set (Gina K. Designs); Merry Christmas (Archiver's)
  • Illustrations: boxcar and flat-car (The Stampin' Bean)
  • Cardstock: Real Red, Brilliant Blue (Stampin' Up!); Solar White (Neenah)
  • Coloring Medium: Sketch Markers (Copic)
  • Templates: Circles Embossing Folder (Quickutz)
  • Accents: Ruby Red Liquid Pearls (Ranger Ink); Gold Stickles (Ranger Ink)
HAPPY BEANS
  • Coloring Medium: 0.2 Black Multiliner (Copic)

Tuesday, December 14, 2010

The Great Outdoors...

to view an image up-close, please click on the photo
My super cool brother-in-law and his girlfriend are very adventurous. They love to go hiking and camping and they are certainly more fit than we are! I wanted to make them a special Christmas card to help them celebrate the holidays, as we will once again be missing the festivities living so far away from everyone. For this card, I was inspired by the Flourishes Timeless Tuesday Food & Drink Challenge and the City Crafter Challenge Kraft Challenge to create my card.


I wanted to make a pop-up card that featured a tent, and I was lucky enough to find a template at the interestingly titled Popular Kinetics Press. After altering the template to the right size, I assembled it and got to creating a little scene.

the glass of milk is stamped on vellum, with a white backing
I used images from the so cute set I won from Lawn Fawn (I helped to name their super fun tutorials, "Lawn Clippings" -- and yes, I was very pleased with myself for coming up with this witty title!) I thought the little fire on the log (originally intended to go in a fireplace) would make a perfect campfire, and I strung the lights across the top of my tent. The milk and cookies were still laid out for Santa, who will have to pop in through the tent's flap, as there is no chimney on this warm and cozy little abode. I had so much fun making this card, and I hope my brother and his girlfriend have fun in the Great Outdoors, too!

I attached a camp store gift card to the front of the card
BEAN NOTES
  • Stamps: Cozy Christmas (Lawn Fawn)
  • Ink: Memento Tuxedo Black (Tsukineko)
  • Cardstock: Classic Solar White (Neenah); Crumb Cake, Kiwi Kiss (Stampin' Up!)
  • Specialty Paper: White Adhesive-backed Felt (generic)
  • Fibers: Hemp Twine (generic)
  • Coloring Medium: Sketch Markers (generic)
HAPPY BEANS


Monday, December 13, 2010

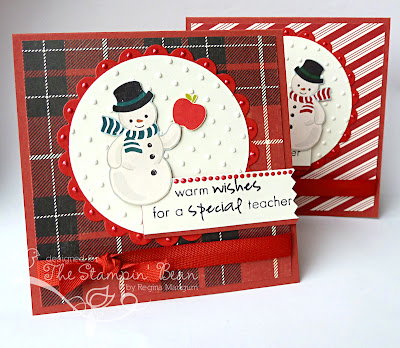
Thank You, Teacher...

to view the image up-close, please click on the photo
The winter holidays are fast approaching, but before my wee little man goes on break, I wanted to be sure to thank his pre-school teachers. Amanda and Nick are two wonderful and caring educators and they have helped my special guy adjust and thrive in school. I am giving them some cozy scarves and gift cards to a certain coffee proprietor, and I thought I would make a pair of thank you cards to go along with them.
The Paper Players have a fun challenge to use your favorite color combination for a certain type of card. I have to admit that I am a sucker for tradition and I still love red for holiday cards. I especially love red and white. I began with this adorable image that I cut out from some patterned paper and then added a cut-out of an apple for him to hold. I just needed some fun paper and ribbon, along with the perfect sentiment, and I was left with two cozy cards to help a pair of deserving teachers brave the cold of winter.

BEAN NOTES
  • Stamps: Icons Extra (Clear & Simple Stamps)
  • Patterned Paper: Sundowner Motel, Falling Snow, Schoolhouse (October Afternoon)
  • Ink: Memento Tuxedo Black (Tsukineko)
  • Cardstock: Riding Hood Red (Stampin' Up!); Choice Snow (Taylored Expressions)
  • Fibers: Pure Poppy Twill (Papertrey Ink)
  • Accents: Ruby Red Liquid Pearls (Ranger Ink)
  • Templates: Swiss Dots Embossing Folder (Provo Craft)
HAPPY BEANS
  • Classic Circle and Classic Scalloped Circle Nestabilities (Spellbinders)


Sunday, December 12, 2010

A Matched Pair...

to view the image up-close, please click on the photo
At this time of year, there are many people to thank for helping us through the past twelve months. Two people we could not have gotten along without are our son's two babysitters, Ally and Ashlee. They are lovely, beautiful, and talented young women, both of whom are studying music at a prestigious music school here in Manhattan. They are so sweet with our little guy, and they certainly have more energy than I do when it comes to keeping up with him!
To thank them both, I wanted to make a pair of nice cards into which I will place a gift card. They play such a key role in our son's life (and they let my husband and I have a date night every once in a while!) This past week's Moxie Fab World Thank You Card Challenge and today's Studio Challenge were the perfect excuse to make these matched pair of cards to show our gratitude.

SPILLING THE BEANS
  1. Make card from cardstock.
  2. Stamp musical background, trim, mat, and adhere.
  3. Adhere snowflake die-cuts. Adhere button.
  4. Stamp sentiment. Trim, mat, and adhere.
BEAN NOTES
  • Stamps: Thank You Limited Edition (Clear & Simple Stamps); Sheet Music (Cornish Heritage Farms)
  • Ink: Soft Suede, Riding Hood Red Classic Dye Ink (Stampin' Up!)
  • Cardstock: Riding Hood Red, Very Vanilla, Marina Mist (SU!)
  • Accents: Button (generic)
HAPPY BEANS
  • Accents: Felt Flurries (SU!)

Saturday, December 11, 2010

Lego My Eggo...

to view an image up-close, please click on the photo
My fun-loving father-in-law is one of those "Christmas babies" -- born so close to Christmas that he always got the "Happy Birthday...Merry Christmas" gifts as a kid. We always make sure to celebrate his birthday with extra special love to make up for all those years of deprivation! This year, we got him a really fun Lego set (the whole family is addicted!) and I thought I would make him a card to go with it. It was the perfect chance to make something for the Moxie Fab World Birthday Card Challenge, too!
I don't have any Lego stamps, so I had to create my own, which was actually very simple to do with my word processing program. I created the frame with my Lego "pieces" and printed them out twice so that I could pop them up for some dimension. The little cute Lego guy is just clip-art from the web.
To really make this a fun card, I stamped balloons from the Taylored Expressions set, Make a Wish, which has coordinating balloon dies (so much easier to do than fussy cutting with scissors!) I strung the balloons with twine from the TE Make a Wish Project Pantry and I was left with a really bright and cheery card for the biggest kid I know!

BEAN NOTES
  • Stamps: Make a Wish (Taylored Expressions)
  • Ink: Brilliant Blue, Real Red, Wild Wasabi, Peach Parfait Classic Dye Ink (Stampin' Up!)
  • Cardstock: Choice Snow (TE); Real Red, Wild Wasabi, Peach Parfait, Brilliant Blue (SU!)
  • Fibers: Baker's Twine from TE Make a Wish Project Pantry Kit (TE)
  • Images: Lego (thestampin'bean); Lego Man (clip art)
HAPPY BEANS


Thursday, December 9, 2010

Handmade with Love...

to view the image up-close, please click on the photo
I have been in full-on Christmas mode and was, frankly feeling a bit bah-humbug. So, I thought I would take a break from making holiday goodies and made a mini card -- just for fun! When I saw this sewing machine image from the sweet Taylored Expressions set From the Heart, I thought I would make a little card featuring a tag that can be removed and used by the card recipient. I know a lot of craft gals, and a "handmade with love" tag is certainly something that would come in handy! To fasten the tag to the card, I simply threaded a piece of embroidery thread through a couple punched holes and tied it to the card. An easy snip with scissors removes it!

BEAN NOTES
  • Stamps: From the Heart and Borderlicious (Taylored Expressions)
  • Cardstock: Crumb Cake, Blushing Bride (Stampin' Up!); Choice Buttercream (TE)
  • Ink: Bravo Burgundy Classic Dye (SU!)
  • Tools: Classic Circle Nestabilities (Spellbinders)
  • Coloring Medium: Stampin' Write Marker (SU!)
HAPPY BEANS
  • Fibers: Blushing Bride Ribbon (SU!)


Wednesday, December 8, 2010

Think Snow...

to view the image up-close, please click on the photo

Okay, so it feels like it should be snowing outside because we have the draftiest bedroom (where my craft space is located) in Manhattan, but there have been only a few flurries here and there. So, I'm thinking snow as hard as I can, because, if it's going to be this cold, there should be some payoff, right? No such luck so far, so I did the next best thing: make a card about snow! How perfectly perfect was it that the City Crafter Challenge this week is all about this wintery fluff?
I got out the new Clear and Simple Stamps {SOTM}, Icons I  and the coordinating sentiment set, Icons Extra and got down to snowmaking business. The thing I love about clear stamps is that they are easily manipulated to follow slight curves, which I did here with the wishful sentiment I chose. If this works, I may have to make a card that says "Think Lottery Win!"


SPILLING THE BEANS
  1. Make card from cardstock.
  2. Trim patterned paper, mat, and adhere.
  3. Stamp sentiment several times in curved pattern. Trim along edges, adhere ribbon. Adhere with foam tape.
  4. Stamp snowflakes on cardstock. Trim and attach brads. Adhere with foam tape.
BEAN NOTES
  • Stamps: Icons I and Icons Extra (Clear & Simple Stamps)
  • Ink: Aqua Mist and Ocean Tides Hybrid (Papertrey Ink)
  • Patterned Paper: Jolly by Golly (Cosmo Cricket)
  • Cardstock: Baja Breeze, Soft Sky (Stampin' Up!); A Blanc Check (CSS)
  • Fibers: Satin Ribbon (Archiver's)
HAPPY BEANS
  • Accents: Silver Brads (Making Memories)